


Content ITV PRO
This is Itvedant Content department
Business Scenario
Hello talented developers!
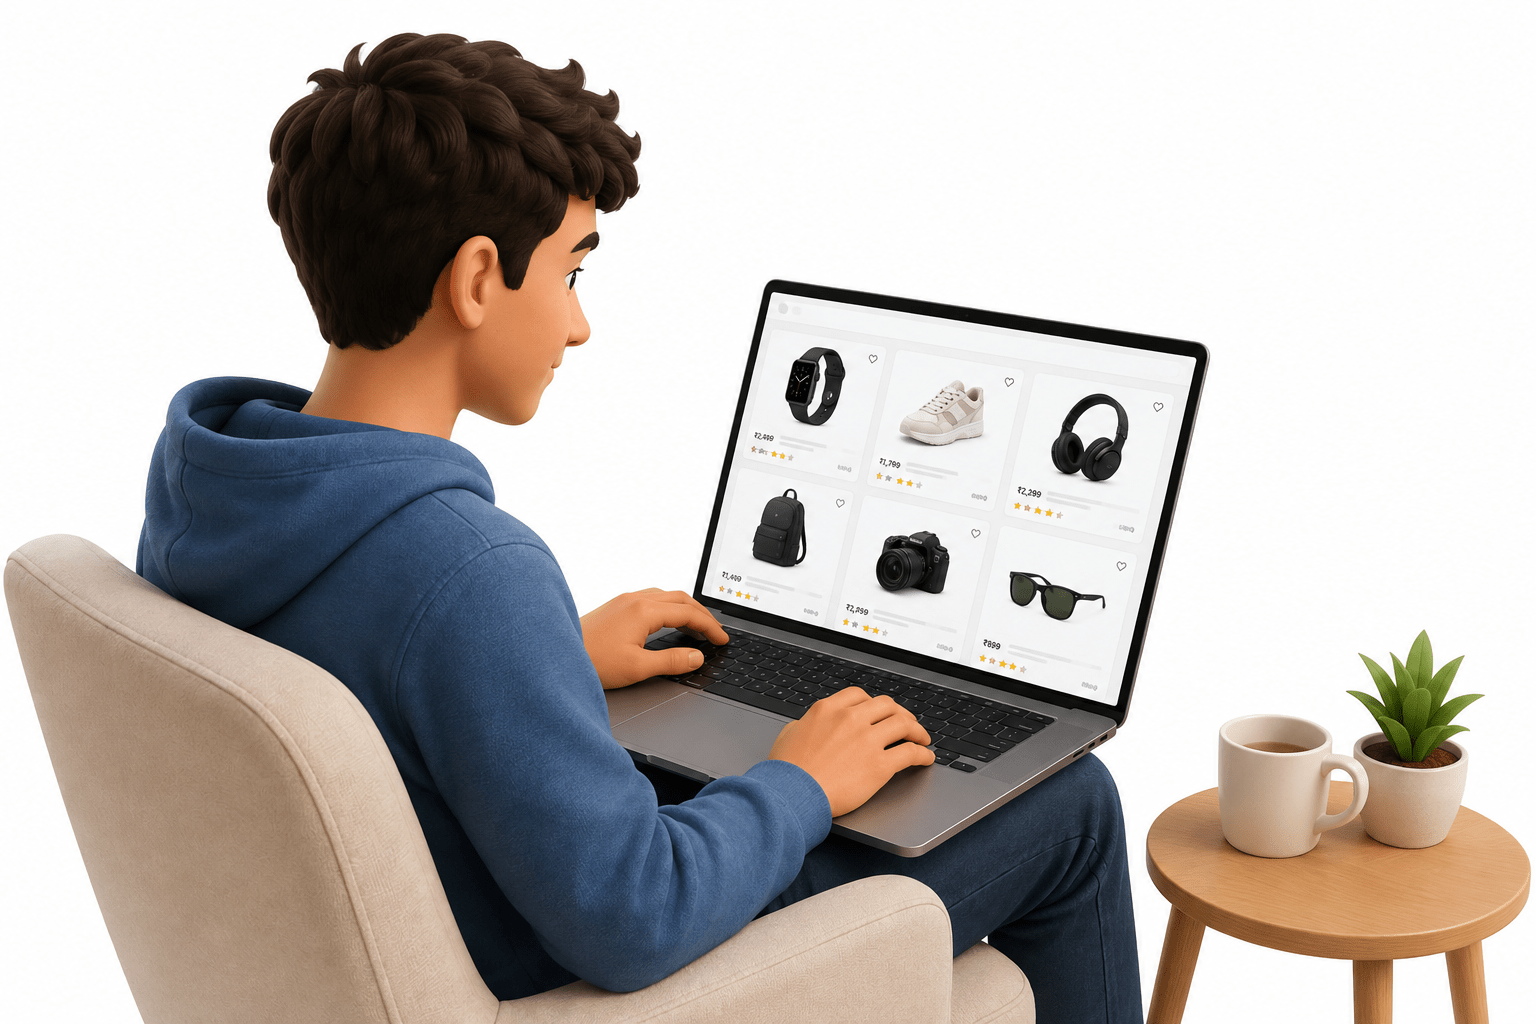
ShopKart has successfully launched its Home Page, where customers can discover products through categories and trending products.
But now, ShopKart needs a dedicated Product Listing Page where customers can browse a larger collection of products in one place.
The Product Page should allow customers to:
View multiple products in a structured grid
View images, names, prices, ratings, and discounts
Add products to the cart
Add products to the cart
ShopKart wants the category filters to be interactive. When a customer selects a category like Electronics, only products from that category should be shown.
Pre-Lab Preparation
Module:
1) React Introduction & JSX
2) Deep Dive into Component & Props
git pull origin branchNameGit Pull
Task 1:Create the Product Page Structure
We already have Product.jsx - Create Product.css
1
Import React, Navbar, and the page CSS in Product.css
2
import React from "react";
import Navbar from "../components/Navbar";
import "./Products.css";

function Products() {

  return (
    <>

      <Navbar />

      <main className="products-page">

      </main>
    </>
  );
}

export default Products;
Add some basic layout styling
3
.products-page {
  width: 100%;
  padding: 20px;
}
Add the Product Page Route
4
<Route path="/products" element={<Products />} />Task 2 : Create the Product Hero Banner
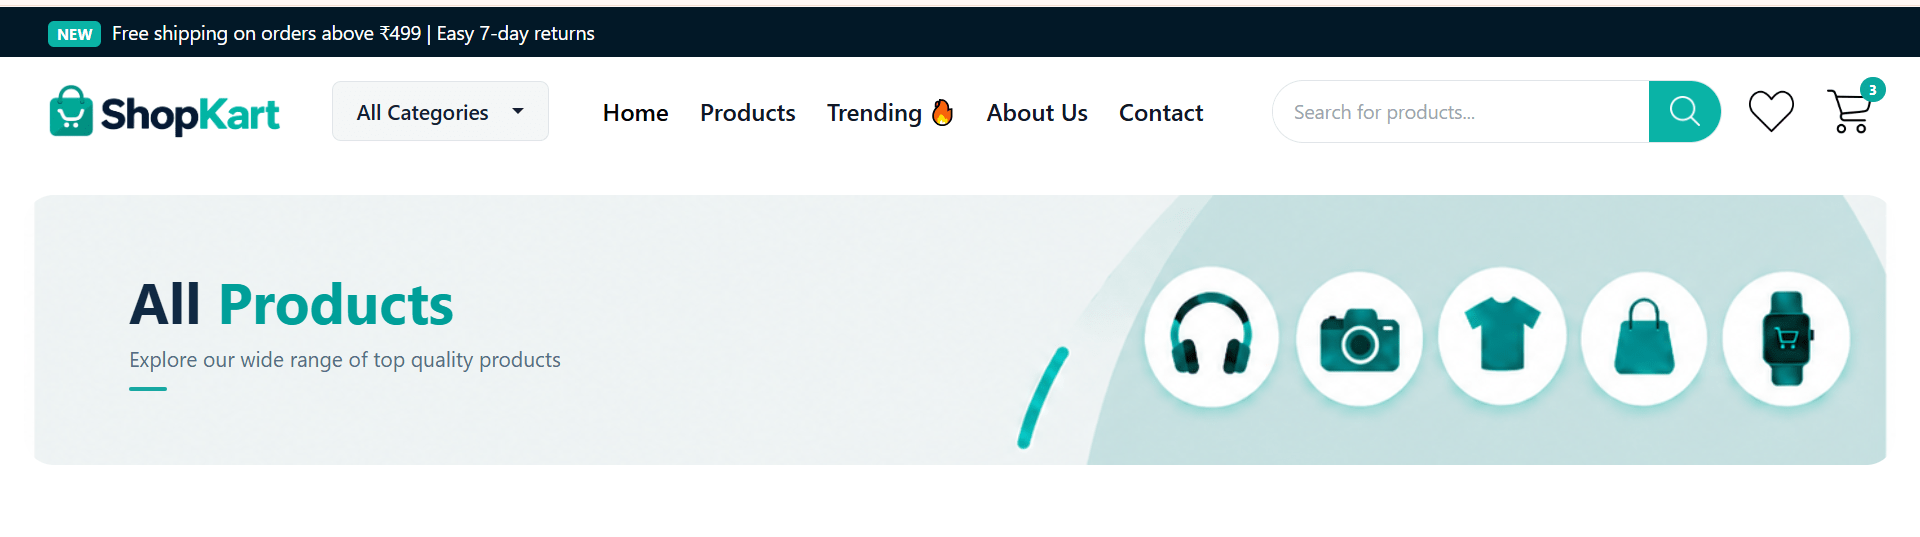
Add banner content in Product.jsx
1
<section className="products-banner">

  <div className="banner-content">

    <h1>  All <span>Products</span> </h1>
    <p> Explore our wide range of top quality products </p>

  </div>

</section>
Style the banner
2
Task 3 : Create the Main Product Layout
Add banner content in Product.jsx add :
1
<section className="products-content">
  <aside className="filter-sidebar">
    <div className="filter-title">
      <h3>FILTERS</h3>
<button>Clear All</button>
</div>
</aside>
<div className="products-area">
<div className="products-header">
<p>Showing all products</p>
</div>
<div className="products-grid">
{/* Product cards will be rendered here */}
</div>
</div>
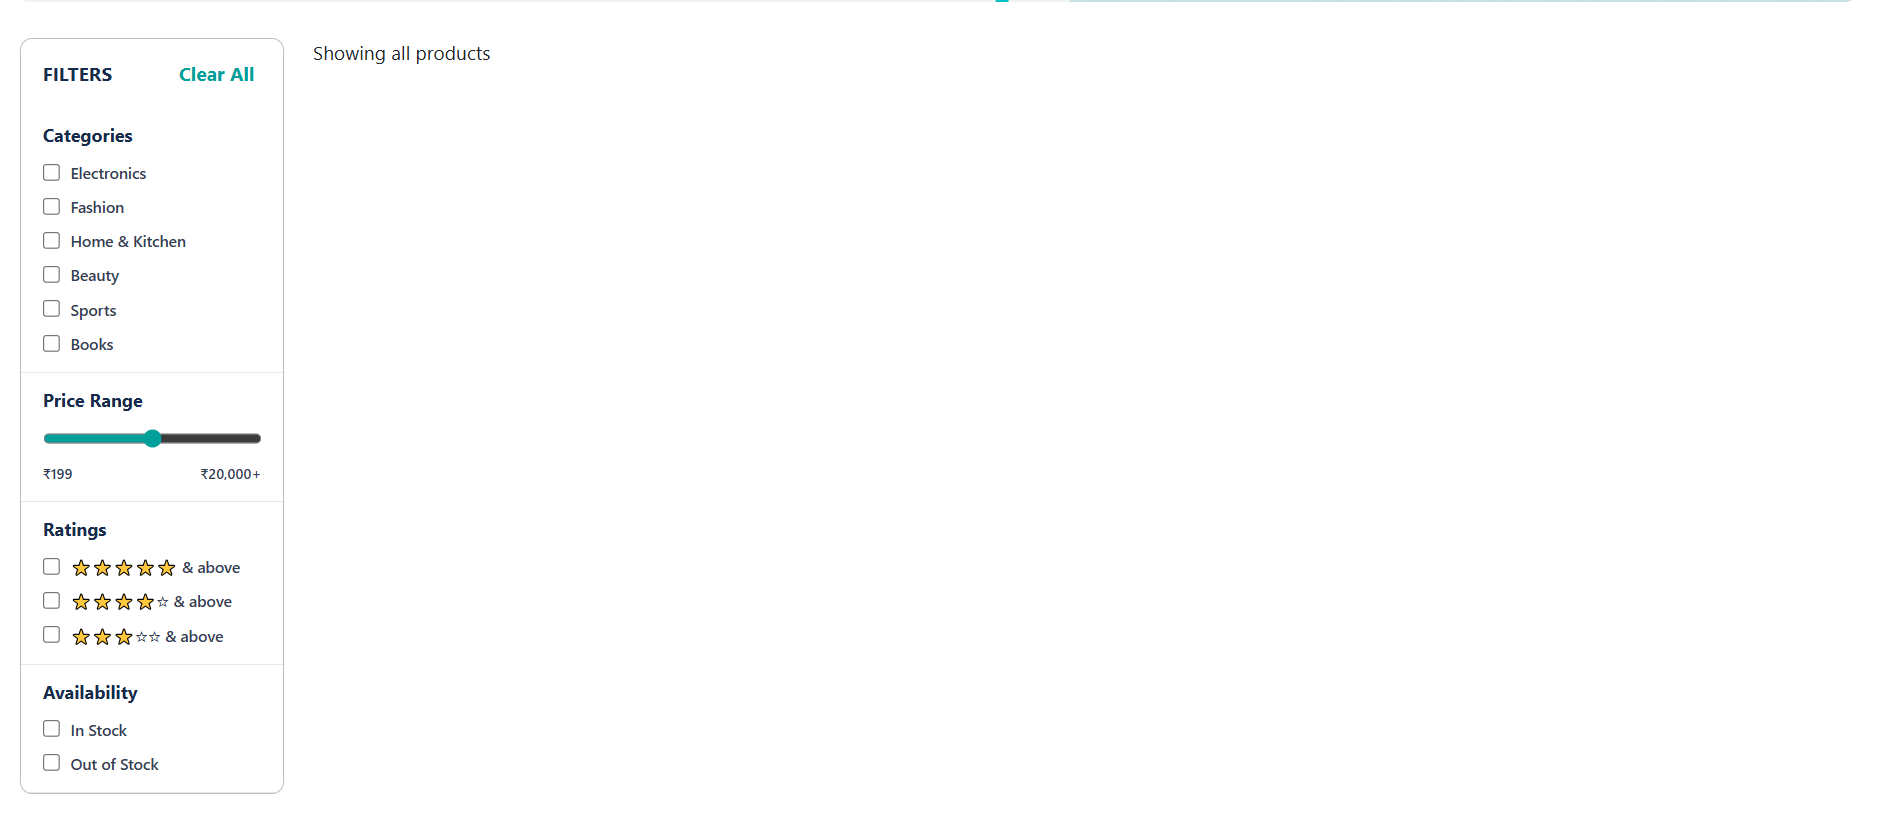
</section>Create the Category Filter Inside filter-sidebar
2
<div className="filter-group">
              <h4>Categories</h4>
              <label> <input type="checkbox" /> Electronics </label>
              <label> <input type="checkbox" /> Fashion </label>
              <label> <input type="checkbox" /> Home & Kitchen </label>
<label> <input type="checkbox" /> Beauty </label>
<label> <input type="checkbox" /> Sports </label>
<label> <input type="checkbox" /> Books </label>
</div>Add the Price Filter
3
<div className="filter-group">

  <h4>Price Range</h4>
  <input type="range" min="199" max="20000" />

  <div className="price-range">
    <span>₹199</span>
    <span>₹20,000+</span>
  </div>

</div>
Add Rating Filters
4
<div className="filter-group">

  <h4>Ratings</h4>
  <label> <input type="checkbox" /> ⭐⭐⭐⭐⭐ & above </label>
  <label> <input type="checkbox" /> ⭐⭐⭐⭐☆ & above </label>
  <label> <input type="checkbox" /> ⭐⭐⭐☆☆ & above </label>

</div>
Add Availability Filters
5
<div className="filter-group">
  <h4>Availability</h4>
  <label> <input type="checkbox" /> In Stock </label>
  <label> <input type="checkbox" /> Out of Stock </label>

</div>
Style the filter section
6
Note: We are not making the Filter section responsive at this stage. We will make it responsive after completing the Products section.
Task 4 : Create the Product Area
At the top of Products.jsx, add:
1
const products = [

  {
    id: 1,
    name: "Samsung Galaxy M14 5G",
    category: "Electronics",
    price: "12,499",
    originalPrice: "14,999",
    rating: 4.4,
    reviews: 1850,
    discount: "17%",
    isAvailable: true,
    image: "/images/products/Samsung_phone.png"
  }
Continue adding the remaining products required for the Product Page using the same object structure.
Render the Product Cards Dynamically
2
 <div className="products-area">

            <div className="products-header"> <p>Showing all products</p> </div>


              <div className="products-grid">

                {products.map((product) => (

                  <div className="product-card" key={product.id}>

                    <div className="product-image">

                      {product.discount && (
                        <span className="discount-badge">-{product.discount}</span>
                      )}
<button className="wishlist-button"> ♡ </button>
<img src={product.image} alt={product.name} />
</div>
<div className="product-info">
<small>{product.category}</small>
<h3>{product.name}</h3>
<div className="rating"> ⭐ {product.rating}
<span> ({product.reviews})</span>
</div>
<div className="product-price"> ₹{product.price}
<del> ₹{product.originalPrice} </del>
</div>
<button className="add-cart-button"> 🛒 Add to Cart </button>
</div>
</div>
))}
</div>
</div>
</section>
</main>
</>
);
}
export default Products;Style the product cards
3
Task 5 : Implement the filter functionality
Import useState
1
import React from "react";At the top of your existing Products.jsx, add:
Create States for the Filters
2
function Products() {

  const [selectedCategory, setSelectedCategory] = useState("");
  const [maxPrice, setMaxPrice] = useState(20000);
  const [selectedRating, setSelectedRating] = useState(0);
  const [availability, setAvailability] = useState("");

  return (
    <>
      <Navbar />

      <main className="products-page">

        {/* Existing Product Page code */}

      </main>
    </>
  );
}
Inside the Product() Component : before return add :
Add the category handler
3
Add this after the useState declarations
const handleCategoryChange = (category) => {

    if (selectedCategory === category) {
      setSelectedCategory("");
    } else {
      setSelectedCategory(category);
    }

  };
This function handles the category checkbox.
Connect the Category Checkboxes
4
We already have the category filter UI.
<label> <input type="checkbox" /> Electronics </label>For example, you currently have:
<label>
  <input type="checkbox" checked={selectedCategory === "Electronics"}
    onChange={() => handleCategoryChange("Electronics")} />
  Electronics
</label>
Add :
<label> <input type="checkbox" checked={selectedCategory === "Fashion"}
    onChange={() => handleCategoryChange("Fashion")} /> Fashion
</label>
Do the same for other categories
<label> <input type="checkbox" checked={selectedCategory === "Home & Kitchen"}
    onChange={() => handleCategoryChange("Home & Kitchen")} /> Home & Kitchen
</label><label> <input type="checkbox" checked={selectedCategory === "Beauty"}
onChange={() => handleCategoryChange("Beauty")}/> Beauty
</label><label> <input type="checkbox" checked={selectedCategory === "Sports"}
onChange={() => handleCategoryChange("Sports")} /> Sports
</label><label> <input type="checkbox" checked={selectedCategory === "Books"}
onChange={() => handleCategoryChange("Books")} /> Books
</label> {/* Main Navbar */}
<nav className="navbar navbar-expand-lg">
<div className="container-fluid">
{/* Logo */}
<a className="navbar-brand" href="/">
<img src="/images/logo.png" alt="ShopKart" className="shopkart-logo"/>
</a> <div className="dropdown category-dropdown">
<button className="category-btn dropdown-toggle" type="button"
data-bs-toggle="dropdown" aria-expanded="false"> All Categories </button>
<ul className="dropdown-menu">
            <li> <a className="dropdown-item" href="#"> Electronics </a> </li>
              <li> <a className="dropdown-item" href="#"> Fashion </a> </li>
              <li> <a className="dropdown-item" href="#"> Home & Kitchen </a> </li>
              <li> <a className="dropdown-item" href="#"> Beauty & Personal Care </a> </li>
              <li> <a className="dropdown-item" href="#"> Sports & Fitness </a> </li>
              <li> <a className="dropdown-item" href="#"> Books & Stationery </a> </li>
            </ul>
          </div>

          {/* Mobile Toggle */}
          <button className="navbar-toggler"  type="button" data-bs-toggle="collapse"
            data-bs-target="#shopKartNavbar" >
            <span className="navbar-toggler-icon"></span> </button>

          {/* Navigation */}
          <div className="collapse navbar-collapse" id="shopKartNavbar">
            <ul className="navbar-nav main-nav">

              <li className="nav-item"> <a className="nav-link active" href="/"> Home
              </a> </li>
              <li className="nav-item"> <a className="nav-link" href="/products"> Products</a>
              </li>
               <li className="nav-item"> <a className="nav-link" href="#"> Deals </a>
                <li className="nav-item"> <a className="nav-link" href="#"> About Us </a> <
              <li className="nav-item"> <a className="nav-link" href="#"> Contact </a>  </li>

            </ul>
{/* Search */}
<div className="search-box">
  <input type="text" placeholder="Search for products..." />
  <button className="search-btn">
    <img src="/icons/search-icon.png" alt="Search" />
  </button>
</div>{/* Icons */}
<div className="nav-actions">
<img src="/icons/heart.png" alt="Wishlist" className="nav-icon" />
<div className="cart-wrapper">
<img src="/icons/cart-icon.png" alt="Cart" className="nav-icon" />
<span className="cart-count">3</span> </div></div>
</div>
</div>
</nav>
</>
);
}
export default Navbar;Inside components folder - create Navbar.css file
2
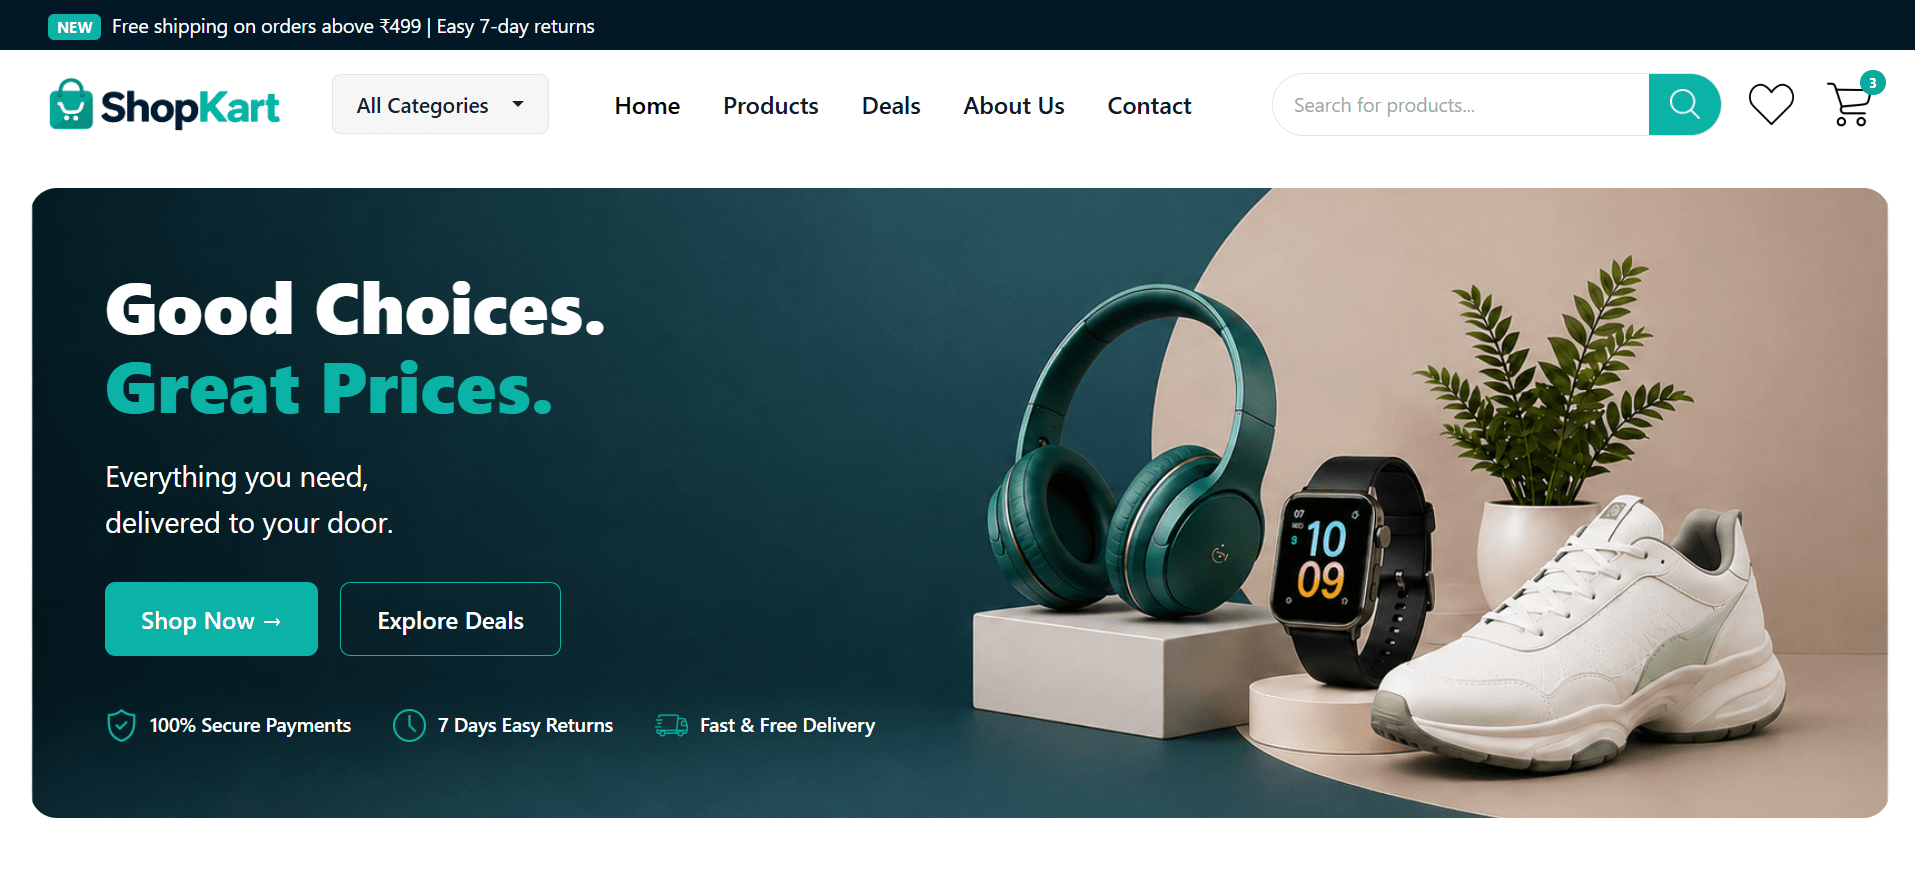
Task 2: Build the Home Hero Section
Inside the Home page, after <Navbar />, add:
1
import React from "react";
import Navbar from "../components/Navbar";
import "./Home.css";

function Home() {
  return (
    <>
      <Navbar />

      {/* Hero Section */}
      <section className="hero-section">
        <div className="hero-content">
          <h1> Good Choices. <br /> <span>Great Prices.</span> </h1>

          <p> Everything you need, <br /> delivered to your door. </p>

          <div className="hero-buttons">
            <button className="shop-btn">Shop Now →</button>
<button className="deal-btn">Explore Deals</button>
</div>
{/* Hero Benefits */}
<div className="hero-benefits">
<div className="benefit-item">
<img src="/icons/secure.png" /> <p>100% Secure Payments</p> </div>
<div className="benefit-item">
<img src="/icons/clock.png" /> <p>7 Days Easy Returns</p> </div>
<div className="benefit-item">
<img src="/icons/express-delivery.png" /> <p>Fast & Free Delivery</p> </div>
</div>
</div>
</section>
</>
);
}
export default Home;Style the hero section : Inside pages folder - create Home.css file
2
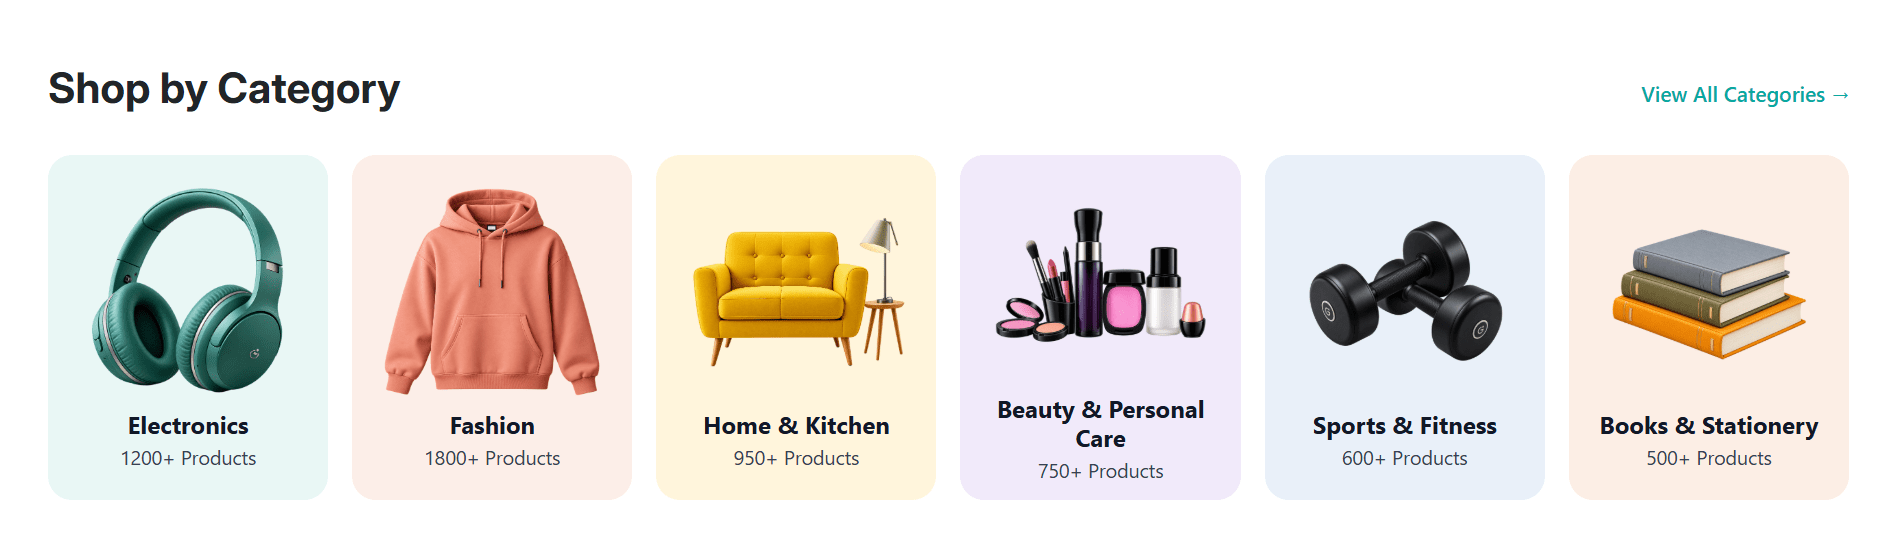
Task 3: Build Shop by Category
Below the hero section we will add Shop by category section
1
{/* Shop By Category */}
<section className="category-section">
  <div className="section-heading">
    <h2>Shop by Category</h2>

    <a href="#">View All Categories →</a>
  </div>


  <div className="category-list">
    <div className="category-card electronics">
      <img src="/images/category-electronics.png" alt="Electronics" />
      <h3>Electronics</h3>
      <p>1200+ Products</p>
    </div>


    <div className="category-card fashion">
      <img src="/images/category-fashion.png" alt="Fashion" />
      <h3>Fashion</h3>
      <p>1800+ Products</p>
    </div>
<div className="category-card home-kitchen">
<img src="/images/category-home.png" alt="Home & Kitchen" />
<h3>Home & Kitchen</h3>
<p>950+ Products</p>
</div>
<div className="category-card beauty">
<img src="/images/category-beauty.png" alt="Beauty & Personal Care" />
<h3>Beauty & Personal Care</h3>
<p>750+ Products</p>
</div>
<div className="category-card sports">
<img src="/images/category-fitness.png" alt="Sports & Fitness" />
<h3>Sports & Fitness</h3>
<p>600+ Products</p>
</div>
<div className="category-card books">
<img src="/images/category-books.png" alt="Books & Stationery" />
<h3>Books & Stationery</h3>
<p>500+ Products</p>
</div>
</div>
</section>Style the shop by category section
2
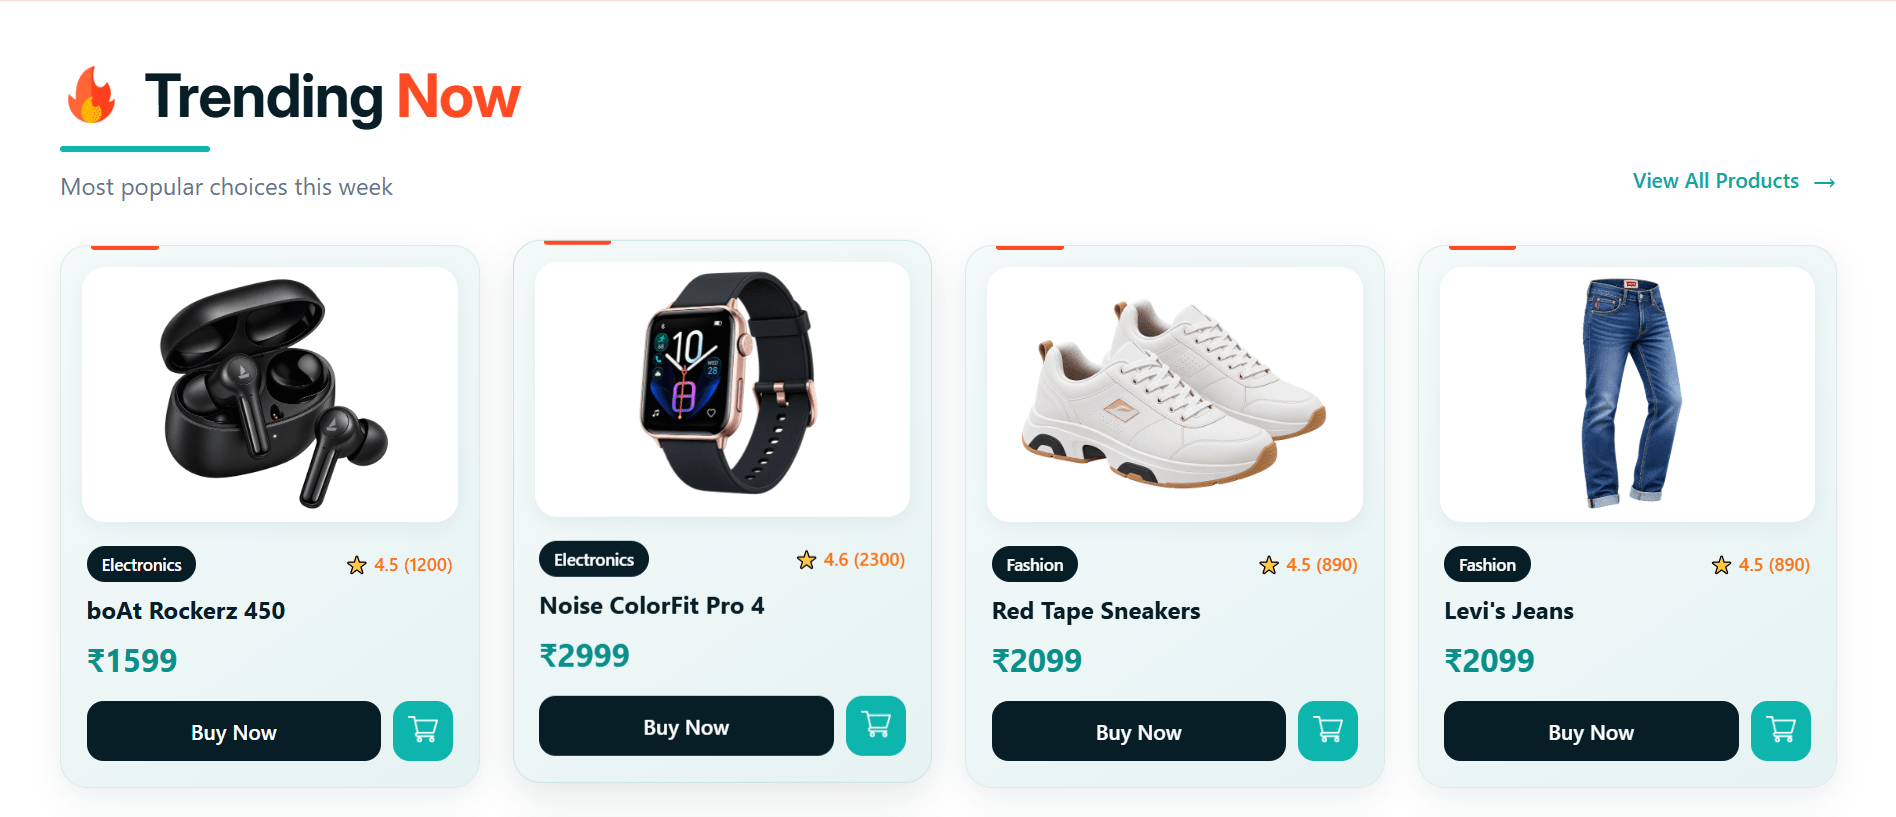
Task 3: Build Trending Products
At the top of Home.jsx, add products list
1
Home.jsx.const products = [
{
id: 1,
name: "boAt Rockerz 450",
category: "Electronics",
price: 1599,
rating: 4.5,
reviews: 1200,
image: "/images/products/headphones.png"
},
{
id: 2,
name: "Noise ColorFit Pro 4",
category: "Electronics",
price: 2999,
rating: 4.6,
reviews: 2300,
image: "/images/products/noisefit.png"
}, {
id: 3,
name: "Red Tape Sneakers",
category: "Fashion",
price: 2099,
rating: 4.5,
reviews: 890,
image: "/images/products/sneakers.png"
},
{
id: 4,
name: "Levi's Jeans",
category: "Fashion",
price: 2099,
rating: 4.5,
reviews: 890,
image: "/images/products/jeans.png",
},
{
id: 5,
name: "boAt Airdopes 141",
category: "Electronics",
price: 1299,
rating: 4.4,
reviews: 3400,
image: "/images/products/airdopes.png",
},{
id: 6,
name: "Iphone 17 pro max",
category: "Electronics",
price: 124000,
rating: 4.9,
reviews: 2100,
image: "/images/products/iphone.png",
},
{
id: 7,
name: "Men's Casual Shirt",
category: "Fashion",
price: 899,
rating: 4.3,
reviews: 760,
image: "/images/products/ferrari.png",
},
{
id: 8,
name: "Minimalist Table Lamp",
category: "Home & Kitchen",
price: 1199,
rating: 4.5,
reviews: 540,
image: "/images/products/lamp.png",
},
];Below the category section add product data
2
{/* Trending Products */}
      <section className="trending-products-section" id="trending">

        <div className="trending-section-heading">

          <div className="trending-heading">

            <h2 className="trending-title">
              <span className="trending-icon"> <img src="/icons/trending.png" alt="Trending" />
              </span>
              <span> Trending <strong>Now</strong> </span>
            </h2>

            <div className="trending-accent"></div>
            <p className="trending-subtitle"> Most popular choices this week </p>

          </div>

          <a href="/products" className="trending-view-products"> View All Products
            <span>→</span> </a>

        </div>
<div className="trending-product-grid">
{products.map((product) => (
<div className="trending-product-card" key={product.id}>
<div className="trending-product-image">
<img src={product.image} alt={product.name}/>
</div>
<div className="trending-product-details">
<div className="trending-product-meta">
<span className="trending-product-category"> {product.category} </span>
<span className="trending-product-rating">
⭐ {product.rating} ({product.reviews})
</span>
</div>
<h3>{product.name}</h3>
<div className="trending-product-price"> ₹{product.price} </div>
<div className="trending-product-actions">
<button className="trending-buy-now-button"> Buy Now </button><button className="trending-cart-button">
<img src="/icons/product-cart.png" alt="Cart"/>
</button>
</div>
</div>
</div>
))}
</div>
</section>
</>
);
}
Style the trending products section
2
Note: Link the Trending 🔥 navigation item to the Trending Now section on the Home page using the #trending section ID, instead of creating a separate Trending page.
We are done with this lab. The latest source code has been uploaded to GitHub. You can access the latest commit using the link below:
Git Push
git push origin branchName
Great job!
Your ShopKart Home Page is now ready and looking like a real e-commerce website. Keep going!
Checkpoint
Next-Lab Preparation
Module: Deep Dive into Component & Props
1) React Events & Props: Handling, Syntax, and Conventions
2) React: Conditional Rendering & State with useState
By Content ITV