REACT
Introduction & basics
introductie
PGM4
Materiaal
Canvas
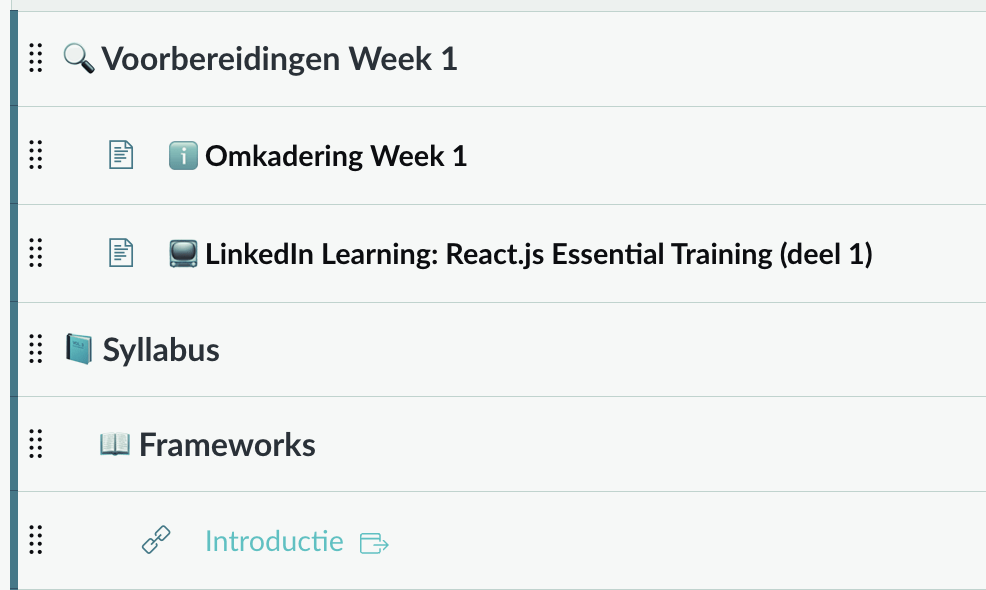
- Voorbereiding
- Syllabus
- Oefeningen
- Github
- Edulist - Slides

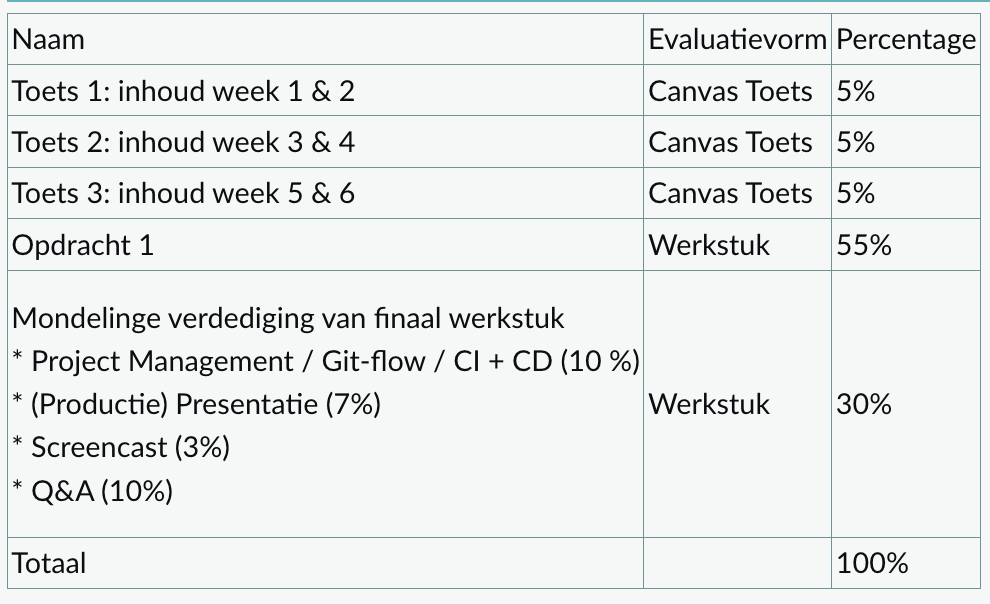
Evaluatie
React.js
Introductie
React
JavaScript library om webinterfaces te bouwen
- Ontwikkelt door engineers bij Facebook
React =
- Snel
- Modulair - opsplitsen van van code in herbruikbare bestanden
- Scalable
- Flexibel
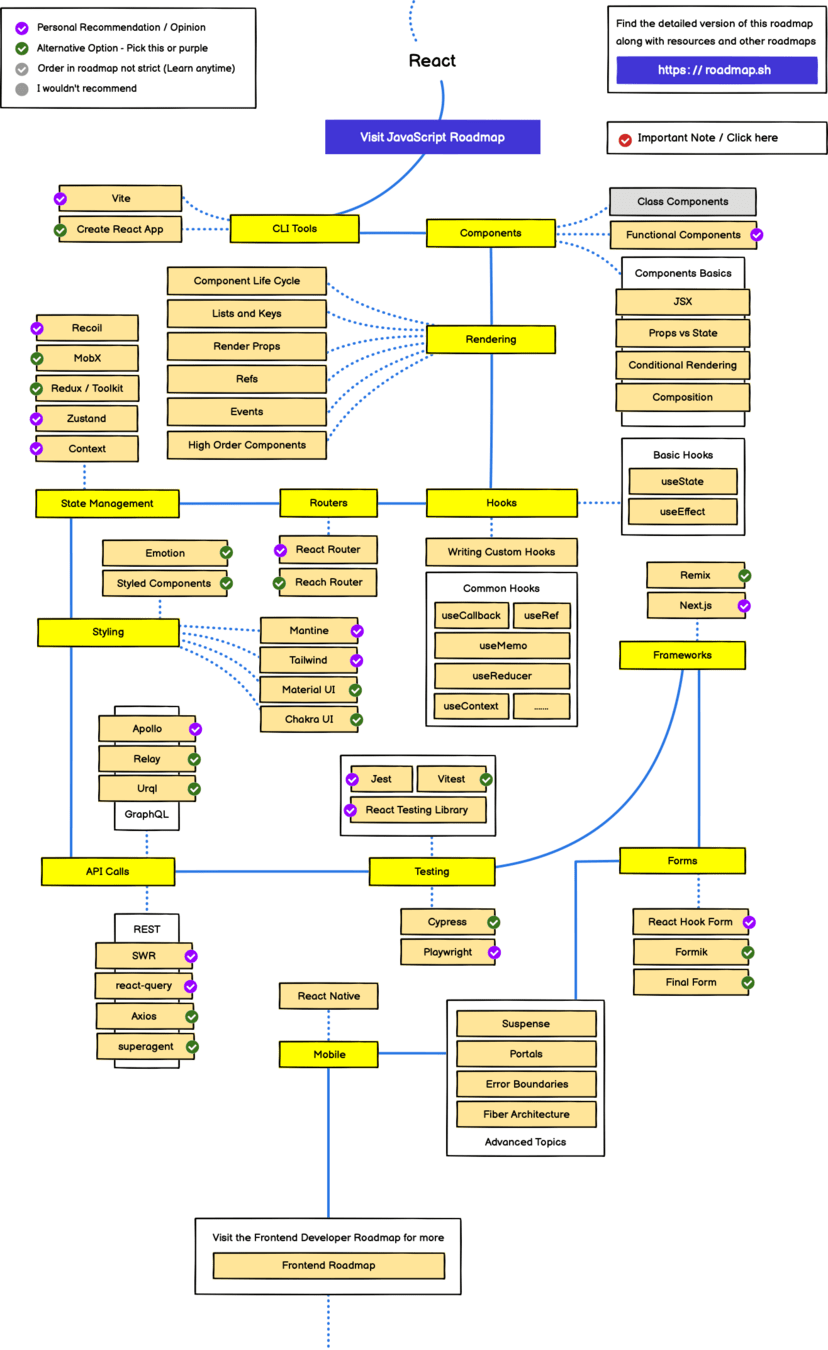
React Ecosystem
React.js
JSX
JSX
= syntax extension, JS-bestand dat lijkt om HTML
JSX is geen valid JS, browsers kunnen het niet lezen.
Het moet eerst compiled worden voor het geïnterpreteerd kan worden door de browser.
De JSX compiler zet de JSX om naar JavaScript
const h1 = <h1>Hello world</h1>;JSX elements
= JS Expressions
- Kunnen worden opgeslagen als een variabele
- doorgegeven als functies
- kan attributen bevatten
const imgCat = <img src='images/cat.jpg' alt='cat'>;const introduction = (
<a href="https://www.example.com">
<h1>
Hello World
</h1>
</a>
);
- Nesten van JSX elementen
JSX elements
JSX elementen mogen maar exact 1 buiten-element hebben
const introduction = (
  	<h1>Hello World</h1>
  	<h2>Dit is niet ok</h2>
);
const introduction = (
  <div>
  	<h1>Hello World</h1>
  	<h2>Dit is ok</h2>
  </div>
);
const introduction = (
  <>
  	<h1>Hello World</h1>
  	<h2>Dit is ook ok</h2>
  </>
);
Fragments
Geen extra node in de DOM
JS in JSX elements
Maak gebruik van accolades
let expr = <h1>{10 * 10}</h1>;let introduction =
<h1>
Hello, {fullName(user)}!
</h1>JSX elements & class
Het woord class is gereserveerd in JS, daarom maken we gebruik van className ipv class om een klasse toe te voegen aan een JSX element
<h1 class="small">Hello World</h1>const heading = <h1 className="small">Hello World</h1>JSX elements
JSX elementen moeten altijd een closing tag hebben
<img src="cat.jpg" > //-> niet ok<img src="cat.jpg" /> //-> wel okJSX elements key
een attribuut als unieke indentifier
<ul>
  <li key="key1">One</li>
  <li key="key2">Two</li>
  <li key="key3">Three</li>
  <li key="key4">Four</li>
</ul>
JSX & conditional rendering
JSX ondersteund geen if/else
Andere opties:
- a ternary within curly braces in JSX
- an
ifstatement outside a JSX element - the
&&operator
const heading = ( <h1> { age >= drinkingAge ? 'Buy shots' : 'Buy candy' } </h1>);const heading = (
{ age >= drinkingAge &&
<h1> Buy shots you are {age}</h1>
}
Virtuele DOM
React uses Virtual DOM, which can be thought of as a blueprint of the DOM. When any changes are made to React elements, the Virtual DOM is updated. The Virtual DOM finds the differences between it and the DOM and re-renders only the elements in the DOM that changed. This makes the Virtual DOM faster and more efficient than updating the entire DOM.
Een blueprint van een huis aanpassen gaat sneller dan het effectieve huis aanpassen
React.js
React App maken
create-react-app
Benodigheden
- Node
- NPM (Node Package Manager)
npx create-react-app myfirstreactapp Structuur
myfirstreactapp
├── node_modules
├── public
│   ├── favicon.ico
│   ├── index.html
│   ├── logo192.png
│   ├── logo512.png
│   ├── manifest.json
│   └── robots.txt
├── src
│   ├── App.css
│   ├── App.js
│   ├── App.test.js
│   ├── index.css
│   ├── index.js
│   ├── logo.svg
│   ├── serviceWorker.js
│   └── setupTests.js
├── .gitignore
├── package.json
├── package-lock.json
└── README.md
Server starten
cd myfirstreactappnpm startVerander naar de juiste directory (folder)
Start
.createRoot Container
const root = ReactDOM.createRoot(document.getElementById('root'));
root.render(
  <React>
    <App />
  </React>
);
Aanmaken van een root container en renderen van een component
React.js
Components
Functional components
Herbruikbare stukjes van de interface
- Start met een hoofdletter
- PascalCase
- import react bovenaan
- Returned een JSX element
src/components/Button.js
import React from "react";

export default function Button() {
	return (
      <button>My Button</button>
           );
}
Components - import
src/components/Button.js
import React from "react";

export default function Button() {
	return (
      <button>My Button</button>
           );
}
import React from "react";
import Button from "./components/Button";

function App() {
	return (
		<div>
			<Button />
		</div>
	);
}
export default App;
src/App.js
Components & props
Properties doorgeven
src/components/Button.js
import React from "react";

export default function Button({ txt }) {
	return (
     	 <button>{txt}</button>
           );
}
import React from "react";
import Button from "./components/Button";

function App() {
	return (
		<div>
			<Button txt="Hi Everybody"/>
		</div>
	);
}
export default App;
src/App.js
Components & props
Componenten kunnen interactie hebben met elkaar
import React from "react";
import Button from "./components/Button";

function App() {
	return (
		<div>
			<Button txt="Hi Everybody"/>
		</div>
	);
}
export default App;
src/App.js
import React from "react";
import Button from "./components/Button";

function App() {
  const btnTxt = "Hi Everybody"
	return (
		<div>
			<Button txt={btnTxt}/>
		</div>
	);
}
export default App;
src/App.js
Components & multiple props
import React from "react";
import TeamCard from "./components/TeamCard";

function App() {
	return (
		<div>
			<TeamCard name="Evelien" jobFunction="CEO" />
      		<TeamCard name="Josh" />
		</div>
	);
}
export default App;
src/App.js
import React from "react";

export default function TeamCard({ name, jobFunction = "Employee" }) {
	return (
		<>
			<h2>{name}</h2>
			<p>{jobFunction}</p>
		</>
	);
}
src/components/TeamCard.js
Object properties als attribuut
const scruffy = {
  src: 'linkto_catpicture.jpg',
  alt: 'Scrufy goes fishing',
};

function Cats() {
  return (
    <div>
      <h1>My Cat</h1>
      <img
        src={scruffy.src}
        alt={scruffy.alt}
      />
    </div>
  );
}
Voeg nooit dubbele aanhalingstekens toe rond accolades:
const element = <img src="{user.avatarUrl}" />; //bad stuff!Snippet plugin
Name: ES7+ React/Redux/React-Native snippets
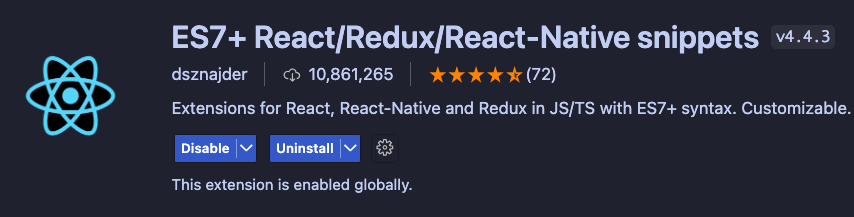
rfc + tabReact Functional Component
General
export/import - JS Modules
Export - Default export
Eenmaal je een export default ... toevoegt zal je de variabele in andere modules kunnen importeren. Met default is er maar 1 element dat je wilt exporteren, je kan de naam bij de import wijzigen
const colors = [
  "#007bff",
  "#f1c40f",
  "#27ae60",
  "#e74c3c",
  "#8e44ad",
  "#3498db",
  "#f39c12",
];

export default colors;
import colorsData from "./colors.js";
console.log(colorsData);Export - Named export
Exporteren van meerdere waardes van een bepaalde module. Je moet naar de exacte naam verwijzen
export const colors = [
	"#007bff",
	"#f1c40f",
	"#27ae60",
	"#e74c3c",
	"#8e44ad",
	"#3498db",
	"#f39c12",
];

export const getRandomColor = () => {
	return colors[Math.floor(Math.random() * colors.length)];
};
import { colors, getRandomColor } from "./colors.js";

console.log(colors);
console.log(getRandomColor());
General
Events
Event Listener and Handlers
function SubmitButton() {

  function handleClick() {
    alert('Submission Successful.');
  }

  return
  	(<button onClick={handleClick}>
      	Submit
	</button>);
}
React.js
Lifecycle en Basic Hooks
Levenscyclus (Lifecycle)
Drie grote categorieën
- Mounting: tijdens de eerste render
- Updating: vanaf de tweede render, als een component update
- Unmounting: wanneer het component verwijderd wordt van de DOM
Levenscyclus
- componentWillMount()
- render()
- componentDidMount()
- shouldComponentUpdate() (true/false)
- componentDidUpdate()
- componentWillUnmount() zal aangeroepen worden voor het component is verwijderd
Mounting
Update
Unmounting
Levenscyclus - Mounting phase
Een component mount wanneer het voor de eerste keer rendert. Het zal de volgende drie methodes aanspreken
- constructor()
- render()
- componentDidUpdate()
Levenscyclus

React.js
Hooks
Hooks
Hooks are functions that let us “hook into” state and lifecycle functionality in function components.
Hergebruik van stateful logica tussen componenten
Hooks roep je niet genest aan, enkel top level. Dus niet in loops, conditions of in geneste functies
Enkel in React Function Components en niet Class Components
Hooks - useState
useState geeft de huidige state van een component en zijn setter-functie. Een state kan je enkel aanpassen door zijn setter-functie
1. useState import
import React, { useState } from 'react';2. useState
const [state, setState] = useState(initialValue);Hooks - useState - voorbeeld
  const [name, setName] = useState('');

  function setNewName(newName) {
    setName(newName);
  }
function Counter({ initialCount }) {
const [count, setCount] = useState(initialCount);
return (
<div>
Count: {count}
<button onClick={() => setCount(initialCount)}>Reset</button>
<button onClick={() => setCount((prevCount) => prevCount - 1)}>-</button>
<button onClick={() => setCount((prevCount) => prevCount + 1)}>+</button>
</div>
);
}prevCount geeft de huidige state weer voor we het aanpassen
Hooks - useEffect
useEffect genereert een side-effect telkens er een component wordt gerenderd
2 argumenten: useEffect(callback, dependencies)
Hooks - use useEffect
1. useEffect import
import React, { useEffect } from 'react';2. useEffect and callback
useEffect(
  () => {
    // Runs side effect here

    return () => {
      // Do clean up here
    };
  },
  [] // Array of dependencies
);
Hooks - useEffect dependencies
2b. useEffect and dependencies
[ ]
[ data ]
Run after initial render
Run after initial render and after every other render
Run after initial render and after data has changed
nothing
Hooks - useEffect cleanup
3. useEffect and cleanup function
optioneel wat je returned
Zal aangesproken worden voor dat de effect weer wordt aangesproken en als het component uit de DOM wordt verwijderd
useEffect(
  () => {
    // Runs side effect here

    return () => {
      // Do clean up here
    };
  },
  [] // Array of dependencies
);
React.js
Styling
React Styling - methodes
- Inline CSS
- Extern CSS
- CSS Modules
- Styled components
1. Inline CSS
Inline CSS met de style-property
// Passing the styles as an object
const warning = {
  color: 'tomato',
  background: 'mistyrose'
};

<div style={warning}>Watch out, a massive dinosaur!</div>

// Passing the styles with an inline object, as a shorthand
<div style={{ color: 'tomato' }}>I am tomato-red!</div>
1. Inline CSS
Gebruik Camelcase voor CSS-properties
 const style = {
    fontSize: '2rem', // String value with units
    fontWeight: 700, // Numeric value interpreted as "700"
    margin: 10, // Numirec value without unit is interpreted as pixels
  };
2. Extern CSS
components/box/box.css
.box {
  margin: 2rem;
  border: 1px solid black;
}

.box__content {
  font-size: 1rem;
  text-align: center;
}
import React from 'react';
import './box.css';
export default const Box = () => (
<div className="box">
<p className="box__content">
Dit is gecentreerde tekst met een zwarte rand rond!
</p>
</div>
);
components/box/Box.js
3. CSS Module
Button.module.css
.error {
  background-color: tomato;
}
import styles from './Button.module.css'; // Import css modules stylesheet as styles
import './another-normal-stylesheet.css'; // Import regular stylesheet
export default const Button = () => {
return <button className={styles.error}>Error Button</button>;
}
another-normal-stylesheet.css
.error {
  background-color: tomato;
}
Button.js
4. Styled Components
npm install styled-componentsimport styled from 'styled-components'
function App() {
return (
<div>
<h1>Styled Components</h1>
<p>Cillum culpa deserunt enim et.</p>
<button>Click ME!</button>
</div>
);
}
export default App;src/App.js
4. Styled Components
import styled from 'styled-components'

const H1 = styled.h1`
color: red;
font-size: 4rem;
`

export default function App() {
  return (
    <div>
      <H1>Styled Components</H1>
      <p>Cillum culpa deserunt enim et.</p>
      <button>Click ME!</button>
    </div>
  );
}
src/App.js
4. Styled Components
import styled from 'styled-components'


const DefaultButton = styled.button`
background-color: #645cfc;
border: none;
padding: 10px;
color: white;
`

export default function App() {
  return (
    <div>
      <h1>Styled Components</h1>
      <p>Cillum culpa deserunt enim et.</p>
      <DefaultButton>Click ME!</DefaultButton>
    </div>
  );
}
src/App.js
React.js
CSS/HTML Frameworks in React
CSS / HTML frameworks
Material UI
Stap 1 : install package
import * as React from 'react';
import Avatar from '@mui/material/Avatar';
import Stack from '@mui/material/Stack';

export default function ImageAvatars() {
  return (
    <Stack direction="row" spacing={2}>
      <Avatar alt="Remy Sharp" src="/static/images/avatar/1.jpg" />
      <Avatar alt="Travis Howard" src="/static/images/avatar/2.jpg" />
      <Avatar alt="Cindy Baker" src="/static/images/avatar/3.jpg" />
    </Stack>
  );
}
Stap 2: import component
npm install @mui/material @emotion/react @emotion/styledMaterial UI

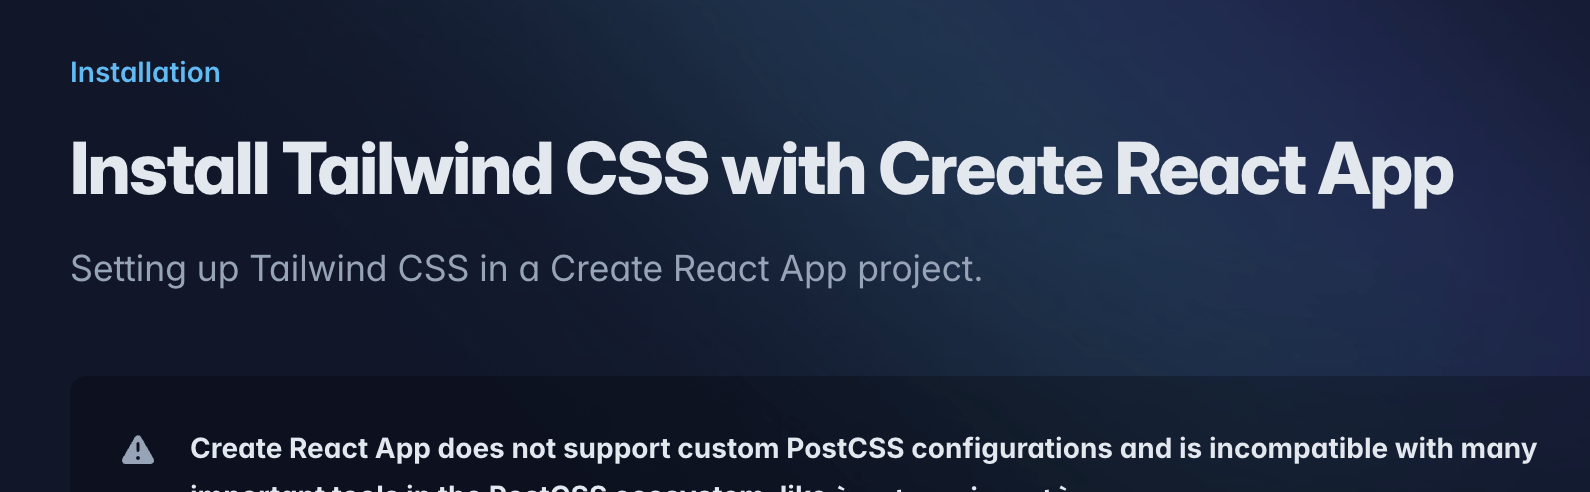
Tailwind CSS
Stap 1 : install package
Stap 2: init to create config-file tailwind.config.js
npm install -D tailwindcssnpx tailwindcss init/** @type {import('tailwindcss').Config} */
module.exports = {
content: [
"./src/**/*.{js,jsx,ts,tsx}",
],
...
}
Tailwind CSS
Stap 3 : add to index.css
@tailwind base;
@tailwind components;
@tailwind utilities;
Stap 4 : read documentation
Tailwind CSS + flowbite
Uitbreiding: Flowbite
Stap 1 : install package
npm i flowbite-reactStap 2 : add to config
/** @type {import('tailwindcss').Config} */
module.exports = {
	content: [
		"./src/**/*.{js,jsx,ts,tsx}",
		"node_modules/flowbite-react/lib/esm/**/*.js",
	],
	theme: {
		extend: {},
	},
	plugins: [require("flowbite/plugin")],
};
Tailwind CSS + flowbite
Uitbreiding: Flowbite
Stap 3 : use components
import React from "react";
import { Avatar } from "flowbite-react";

export default function AvatarImage() {
	return (
     <Avatar
		img="https://mighty.tools/mockmind-api/content/human/57.jpg"
		alt="avatar of Jese"
		rounded
		/>
	);
}
React.js
Routing V6
React Routing
Een library met navigatie componenten voor React.
npm install react-router-domStap 1: include package
createBrowserRouter
Routes aanmaken door JSX elementen mee te geven door gebruik te maken van `createRoutesFromElements`
import { createBrowserRouter, createRoutesFromElements, Route } from 'react-router-dom';

const router = createBrowserRouter(createRoutesFromElements(
  <>
	<Route path="/" element={<Home />}  />
	<Route path="/about" element={<About />}  />
	<Route path="/contact" element={<Contact />}} />
  </>

	)
));RouterProvider
import { createBrowserRouter, createRoutesFromElements, Route } from 'react-router-dom';

const router = createBrowserRouter(createRoutesFromElements(
  <Route path='/' element={ <Home/> }/>
                 .....
));
export default function App () {
return (
<RouterProvider router={ router } />
);
}Nested Routes & Outlet
import { createBrowserRouter, createRoutesFromElements, Route } from 'react-router-dom';

const router = createBrowserRouter(createRoutesFromElements(
  <Route path="/" element={<Root />} errorElement={<ErrorPage />}>
			<Route path="/" element={<Home />}  />
			<Route path="/about" element={<About />}  />
			<Route path="/contact" element={<Contact />}}
			/>
	</Route>
	)
));
import React from "react";
import Navigation from "./Navigation";
import { Outlet } from "react-router-dom";
export default function Root() {
return (
<div>
<Navigation />
<main>
<Outlet />
</main>
</div>
);
}Link & NavLink
We gebruiken geen <a>-tag in react maar Link en NavLink
NavLink is een speciale Link dat weet indien het "actief", "pending" of "transitioning" is. Ideaal voor navigaties
<Link to="/about">About</Link>
<NavLink to="/about">About</NavLink>
Navigate
Een <Navigate> element veranderd de huidige locatie
const UserProfile = ({ loggedIn }) => {
  if (!loggedIn) {
    return (
      <Navigate to='/' />
    )
  }
useNavigate
import { useNavigate } from "react-router-dom";

function useLogoutTimer() {
  const userIsInactive = useFakeInactiveUser();
  const navigate = useNavigate();

  useEffect(() => {
    if (userIsInactive) {
      fake.logout();
      navigate("/session-timed-out");
    }
  }, [userIsInactive]);
}-
navigate(-1)- navigate to the previous URL in the history stack. -
navigate(1)- navigate to the next URL in the history stack. -
navigate(-3)- navigate 3 URLs back in the history stack.
Parameters & useParams
Mogelijkheid tot dynamic routes
const route = createBrowserRouter(createRoutesFromElement(
  <Route path='/articles/:title' element={ <Article /> }/>
))
let { title } = useParams();Toegang tot de value van een URL Parameter
useSearchParams
Toegang krijgen tot de waarde van de query parameters
// Rendered when a user visits "/list?order=DESC"
export const SortedList = (numberList) => {
  const [ searchParams, setSearchParams ] = useSearchParams();
  const sortOrder = searchParams.get('order');
  console.log(sortOrder); // Prints "DESC"
};
setSearchParams
Search Parameters aanpassen
 const [ searchParams, setSearchParams ] = useSearchParams();

  // render the numberList in ascending order
  <button click={ () => setSearchParams( {order: 'ASC'} ) }>
    Sort
  </button>
loader
elke Route kan een loader bevatten om data te voorzien voor dat het rendert
 const [ searchParams, setSearchParams ] = useSearchParams();

  // render the numberList in ascending order
  <button click={ () => setSearchParams( {order: 'ASC'} ) }>
    Sort
</button>React.js
Advanced Hooks
React.js
Custom hooks
Custom hooks
- Bundelen van logica en hergebruiken
- ze starten met use in hun naming convention
export const useToggle = (initialState = false) => {

  const [state, setState] = useState(initialState);

  const toggle = () => { setState(state => !state) }

  return [state, toggle]
}
hooks/useToggle.js
React.js
Extra hooks
Met Context kunnen we een stukje state gecentraliseerd opslaan
om prop drilling tegen te gaan - in diep liggende structuren props doorgeven

Context
1. Create Context
import { createContext } from 'react';

export const MyContext = createContext();
import { useContext } from 'react';
import { MyContext } from './MyContext.js'

const ChildComponent = () => {
  const value = useContext(MyContext);
  return <p>{value}</p>;
}
2. Use Context
Context
3. Provide the context
import { MyContext } from '../context/MyContext.js';

const ParentComponent = () => {

  return (
  	<MyContext.Provider value="Hello world!">
   		<ChildComponent />
	</MyContext.Provider>
  );
}
Reducer
Complexere state, zeker als de verschillende elementen gerelateerd zijn aan elkaar. Anders gebruik je useState
1. Create reducer method: met state & action
const myReducer = (state, action) => {
  switch (action.type) {
    case "increment":
      return { count: state.count + 1 };
    case "decrement":
      return { count: state.count - 1 };
    default:
      return state;
  }
};
Reducer
1. Create reducer method:
const myReducer = (state, action) => {
  switch (action.type) {
    case "increment":
      return { count: state.count + 1 };
    case "decrement":
      return { count: state.count - 1 };
    default:
      return state;
  }
};
2. Create Initiale state
const initialState = {
  count: 0,
};
Reducer
3. useReducer
function MyComponent() {
//call useReducer and pass in the reducer and an initial state

  const [state, dispatch] = useReducer(myReducer, initialState);

  return (
    <div>
      <p>Count: {state.count}</p>
      <button onClick={() => dispatch({ type: "increment" })}>
        Increment
      </button>
      <button onClick={() => dispatch({ type: "decrement" })}>
        Decrement
      </button>
    </div>
  );
}
Reducer
3. useReducer
const [state, dispatch] = useReducer(reducer, initialState);
Onze eigen reducer-function
Initiële state
functie om de reducer functie uit te voeren
onze curren state om te gebruiken
Reducer
4. dispatch: type & payload
dispatch({ type: "increment", payload: id })React.js
Stack
Hygraph
CMS met GraphQL APIs
GraphQL
Schema query language, ask what you want from the client-side

Apollo client
Een framework dat helpt om GraphQL diensten te bouwen
1. Setup Hygraph schema
Schema Models aanmaken
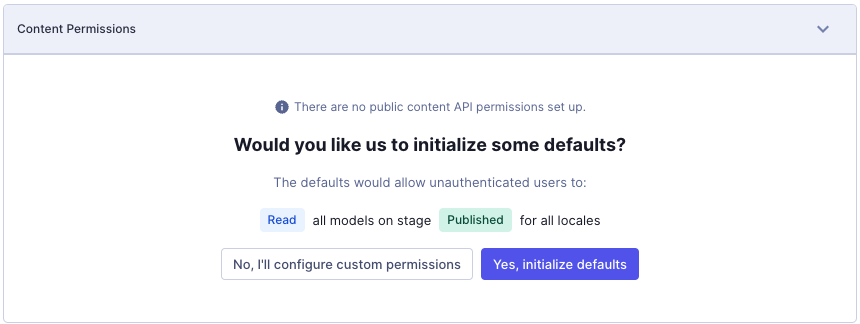
2. Permissions
Project Settings > API Access > Endpoints > Yes, initialize defaults
Read-only permissions of opstellen van een token
Setup Apollo client
1. Install library/dependencies
npm install @apollo/client graphql2. configureer Apollo Client
import { ApolloClient, InMemoryCache, ApolloProvider } from '@apollo/client';


const client = new ApolloClient({
  uri: '',
  cache: new InMemoryCache(),
});
index.js
Setup Apollo client
3. Provider toevoegen
root.render(
  <ApolloProvider client={client}>
    <App />
  </ApolloProvider>,
);
index.js
Queries opbouwen
Nieuw bestand + queries
import { gql } from "@apollo/client";

export const GET_TODOS = gql`
	query getTodos {
		todos {
			description
			id
			isCompleted
			title
		}
	}
`;graphql/queries.js
Queries gebruiken
Gebruik query met useQuery()
import { GET_TODOS } from "./graphql/queries";
....
const { loading, error, data } = useQuery(GET_TODOS);

if (loading) return <p>Loading...</p>;
if (error) return <p>Error : {error.message}</p>;
return (
	<div>
		{data.todos.map((todo) => (
			<div key={todo.id}>
				<h2>{todo.title}</h2>
				<p>{todo.description}</p>
			</div>
		))}
	</div>
	);
Queries + variables
export const GET_POST_BY_SLUG = gql`
	query getPostBySlug($slug: String = "") {
		post(where: { slug: $slug }) {
			content {
				html
			}
			title
		}
	}
`;


....

const { loading, error, data } = useQuery(GET_POST_BY_SLUG, {
	variables: { slug },
	});
Mutations doorvoeren
Permissions aanpassen + token aanmaken
const client = new ApolloClient({
	uri: process.env.REACT_APP_HYG_API,
	cache: new InMemoryCache(),
	headers: {
		Authorization: `Bearer ${process.env.REACT_APP_HYG_AUTH}`,
	},
});
React.js
Optimize
React.js
Helmet
Helmet
This reusable React component will manage all of your changes to the document head.
<Parent>
    <Helmet>
        <title>My Title</title>
        <meta name="description" content="Helmet application" />
    </Helmet>

    <Child>
        <Helmet>
            <title>Nested Title</title>
            <meta name="description" content="Nested component" />
        </Helmet>
    </Child>
</Parent>
Nested or latter components will override duplicate changes
React.js
Programming Patterns & thinking react
Stateful and Stateless
Stateful components container
Behandeld complexe states en logica
Stateless components presentational
Enkel JSX - domme components
React.js
Forms
React.js
ErrorBoundries
React.js