Deploy Machine Learning Model for Real-World Use

Business Scenario
Welcome!
Today is your eleventh day as a Junior Data Scientist at Telecom Customer Intelligence Solutions.
In the previous lab, you successfully built a Streamlit Web Application for predicting customer churn using a trained Logistic Regression model. The application allows users to enter customer information and instantly receive churn predictions through an interactive web interface.
Although the application works perfectly on your local machine, it is only accessible to you. Customer retention managers, business analysts, and stakeholders cannot access the application unless it is deployed over the internet.

The management team now wants to make the Customer Churn Prediction application available to authorized users so that they can access it anytime using a web browser without installing Python or Streamlit.
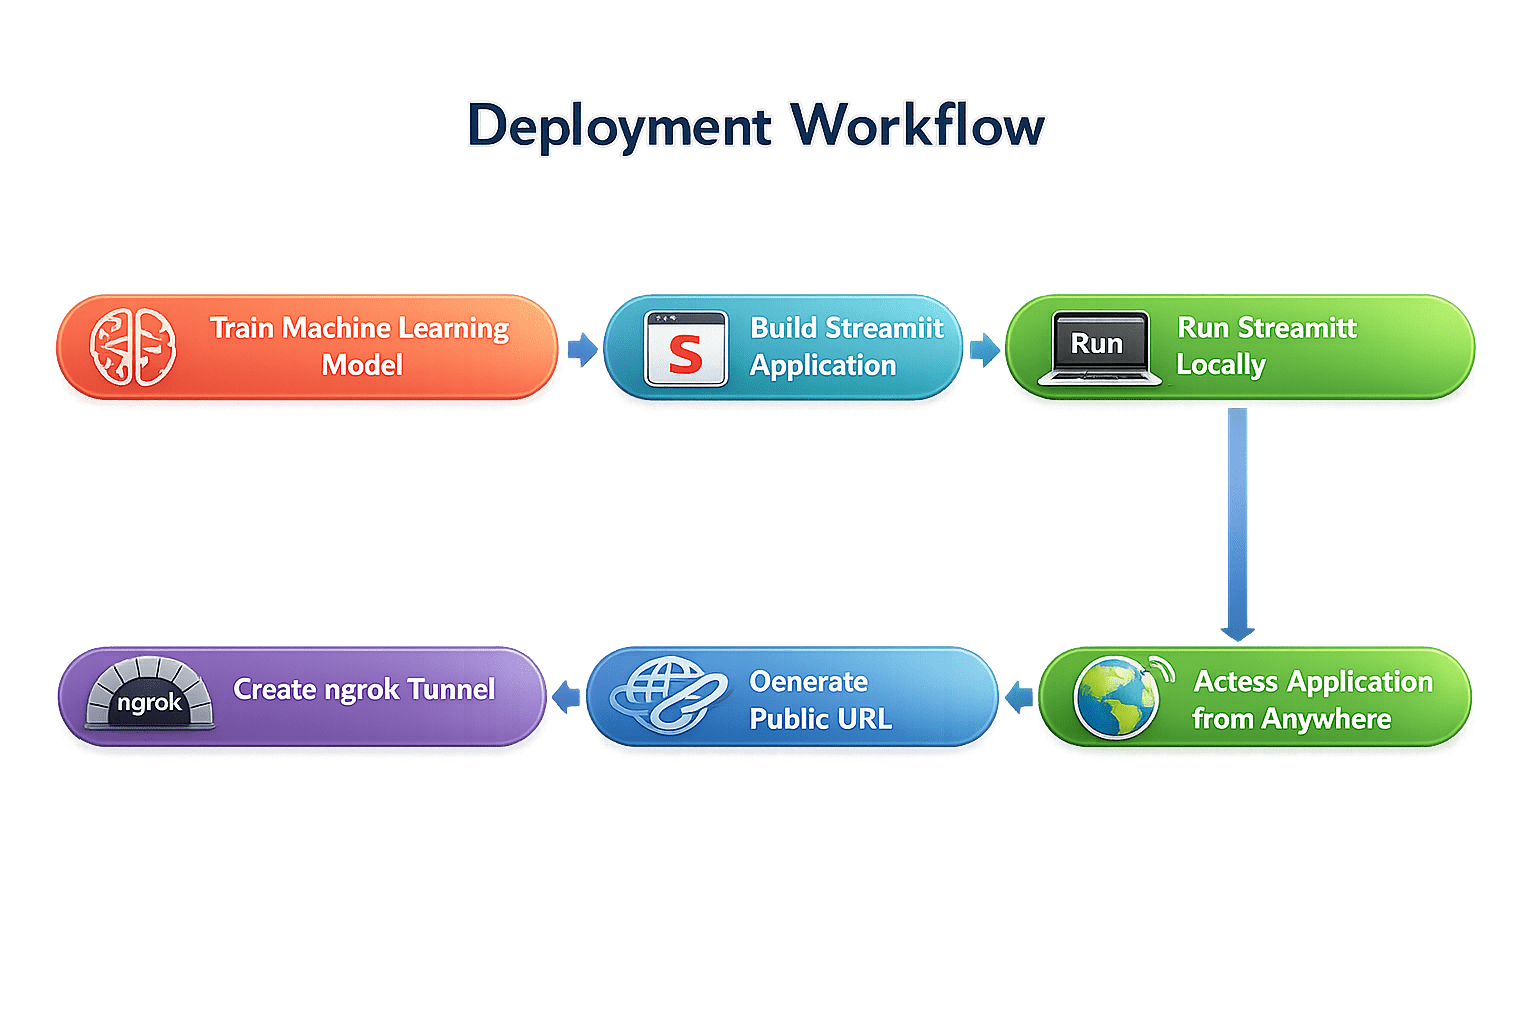
To accomplish this, your manager has asked you to deploy the application using ngrok, a secure tunneling service that creates a temporary public URL for locally running applications.
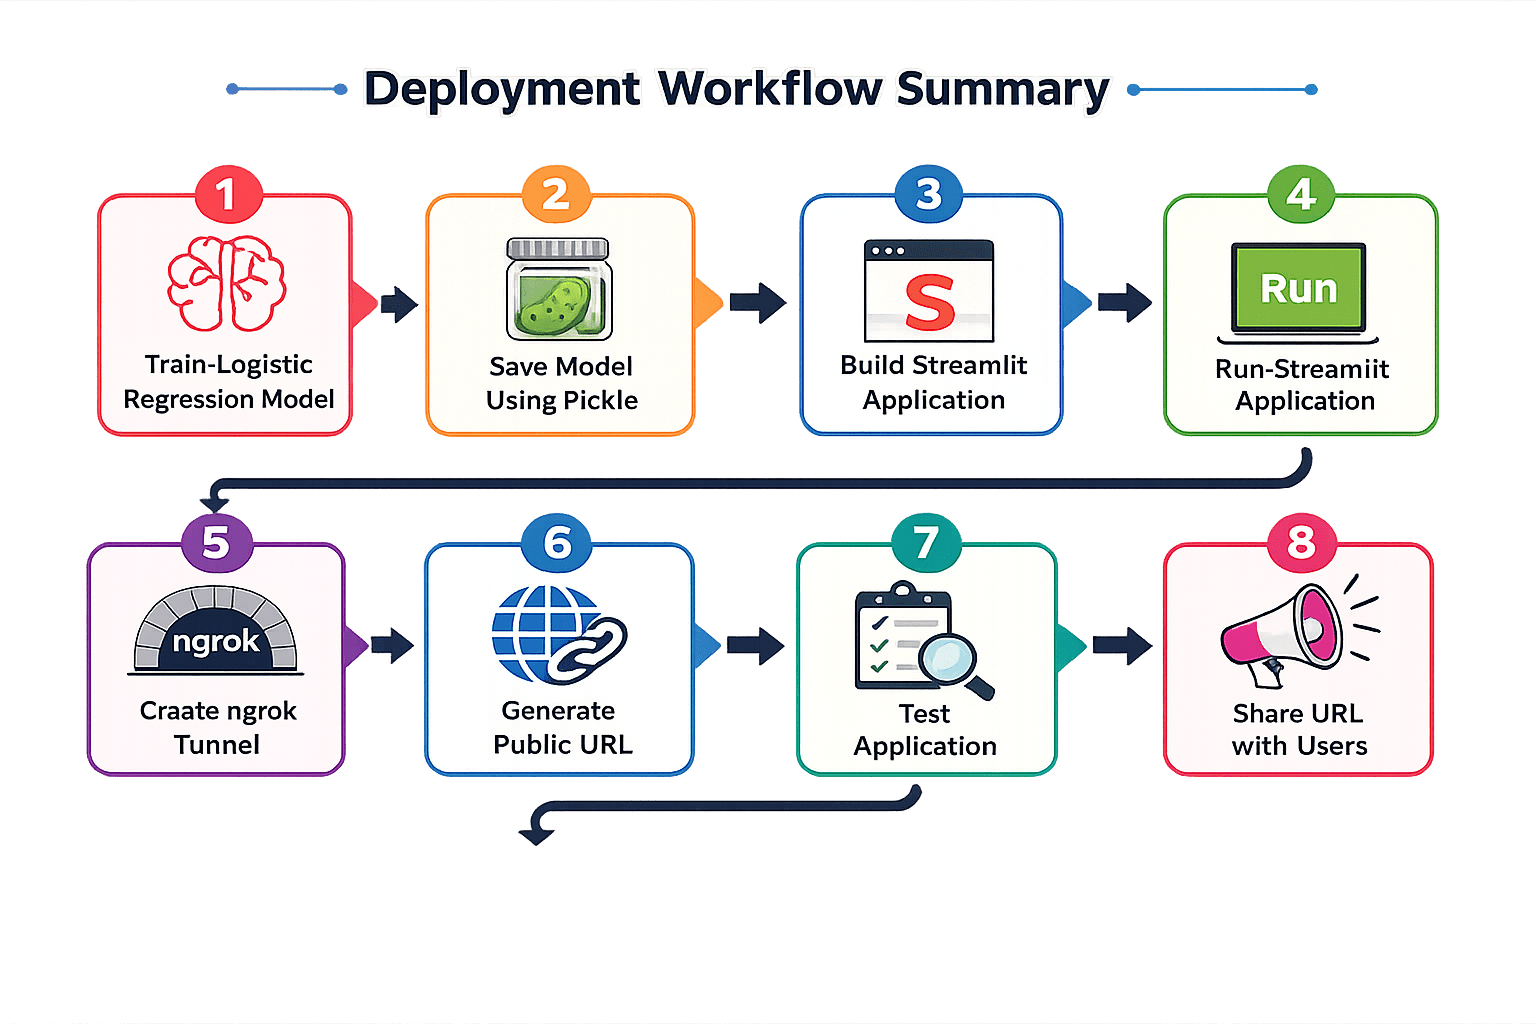
As part of this project, you will:
- Understand Machine Learning Model Deployment.
- Learn the fundamentals of ngrok.
- Create an ngrok account.
- Configure ngrok authentication.
- Deploy a Streamlit application.
- Generate a secure public URL.
- Test the deployed application from different devices.
Pre-Lab Preparation
Topic : Model Deployment Basics
1) Web Application for ML Predictions
git pull origin branchName
Git Pull
Task 1: Understanding Machine Learning Model Deployment
Before deploying a Machine Learning model, it is important to understand why deployment is necessary.
What is Model Deployment?

Model Deployment is the process of making a trained Machine Learning model available for real-world use through a web application or service.
Instead of generating predictions only inside a Jupyter Notebook, deployment allows end users to interact with the model through a simple web interface.
Why is Model Deployment Important?
A Machine Learning model is valuable only when it can be used by business users.
Deployment allows organizations to:
- Make predictions in real time.
- Share applications with users.
- Improve business decision-making.
- Increase accessibility.
- Integrate Machine Learning into daily business operations.
What is ngrok?
ngrok is a secure tunneling service that exposes applications running on your local machine to the internet.
It creates a temporary public URL that forwards requests directly to your local Streamlit application.
For example,
Local Application
http://localhost:8501becomes
https://abcd1234.ngrok-free.appAnyone with the generated URL can access the application using a web browser.
Task 2: Deploy Machine Learning Model
Now that the Streamlit application has been successfully developed, your manager wants you to deploy it so that customer retention managers and business stakeholders can access it remotely.
Create an ngrok Account
1
Before deploying the application, you must create a free ngrok account.
Open Google Chrome (or any web browser) and Visit the official ngrok website:
a
https://dashboard.ngrok.com/signup
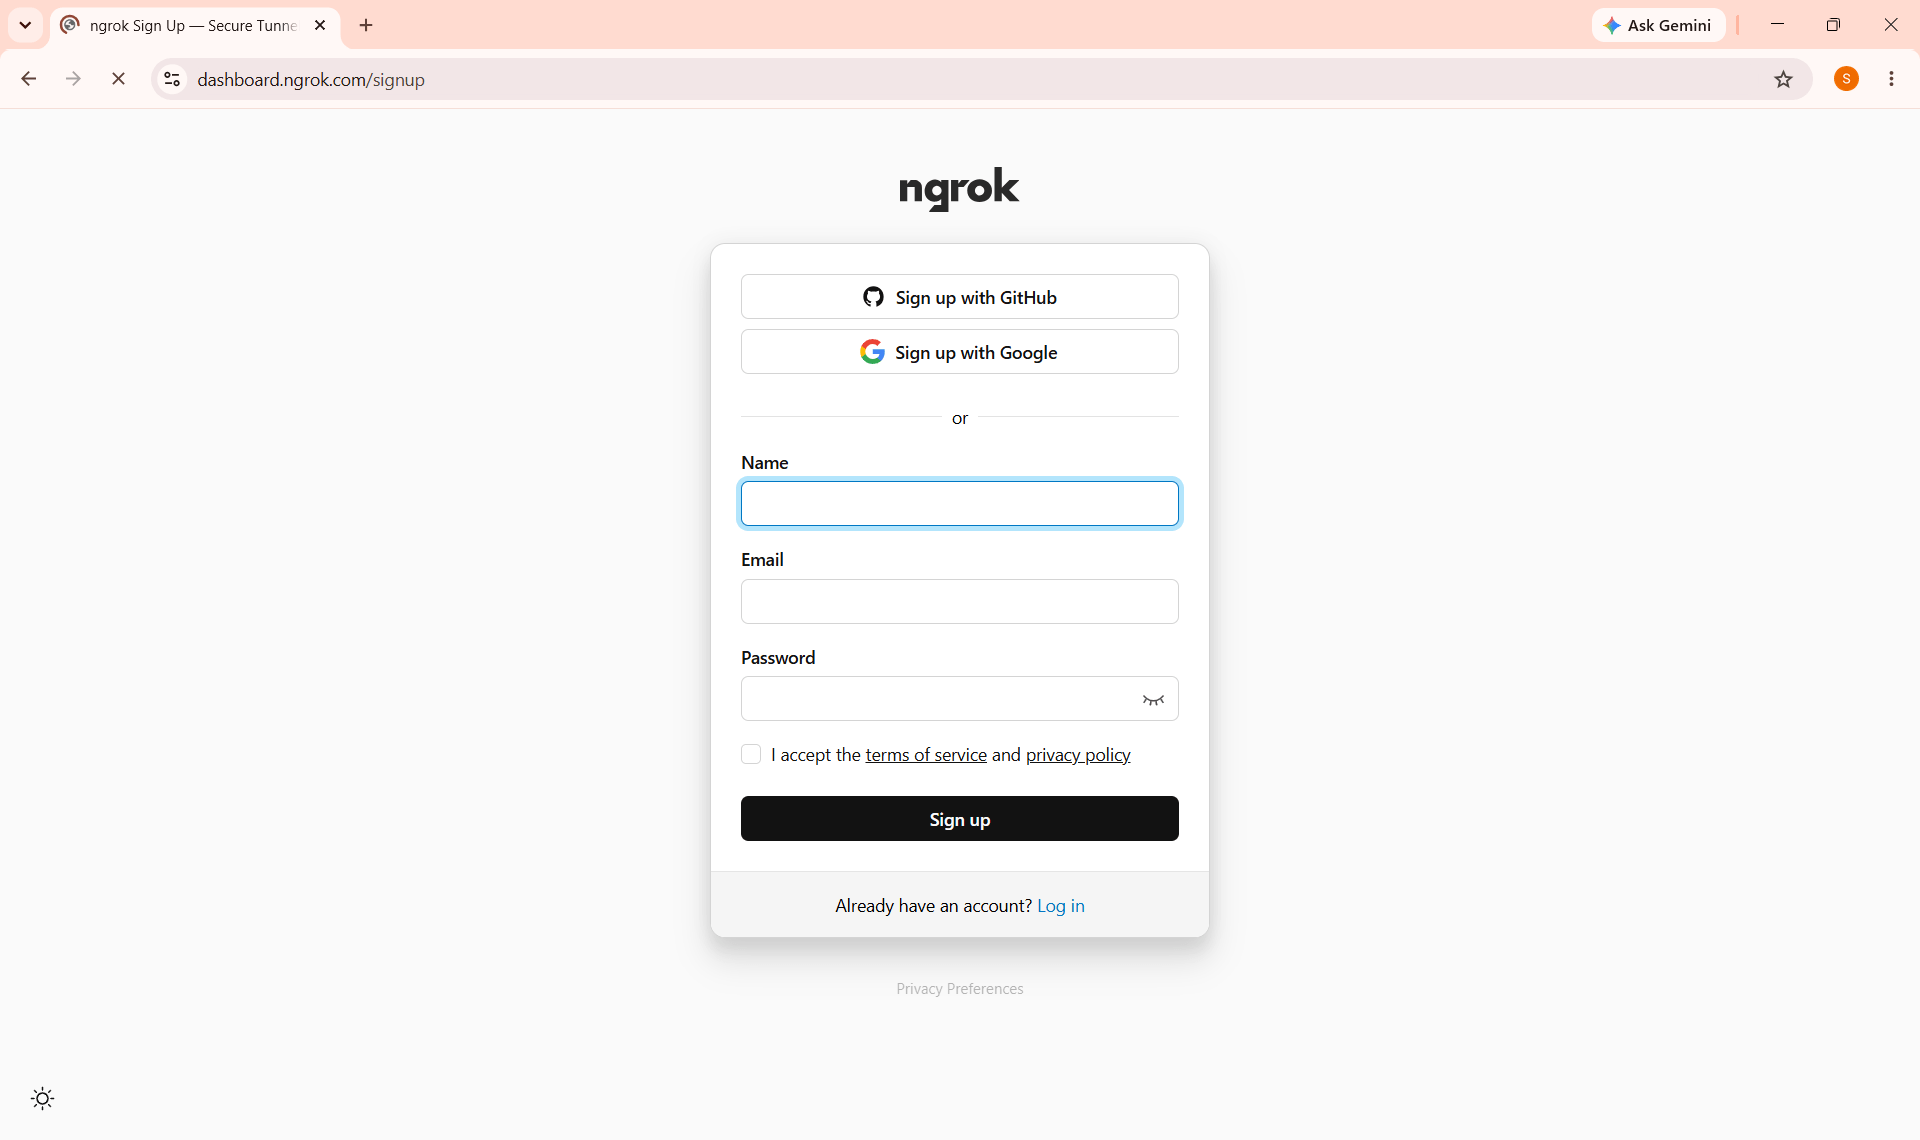
Click Sign Up, Register using your Google Account, GitHub Account, or Email Address, Complete the registration process and Log in to the ngrok Dashboard.
b
Creating an ngrok account allows you to securely expose your local Streamlit application to the internet through a temporary public URL.
Copy Your Authentication Token
2
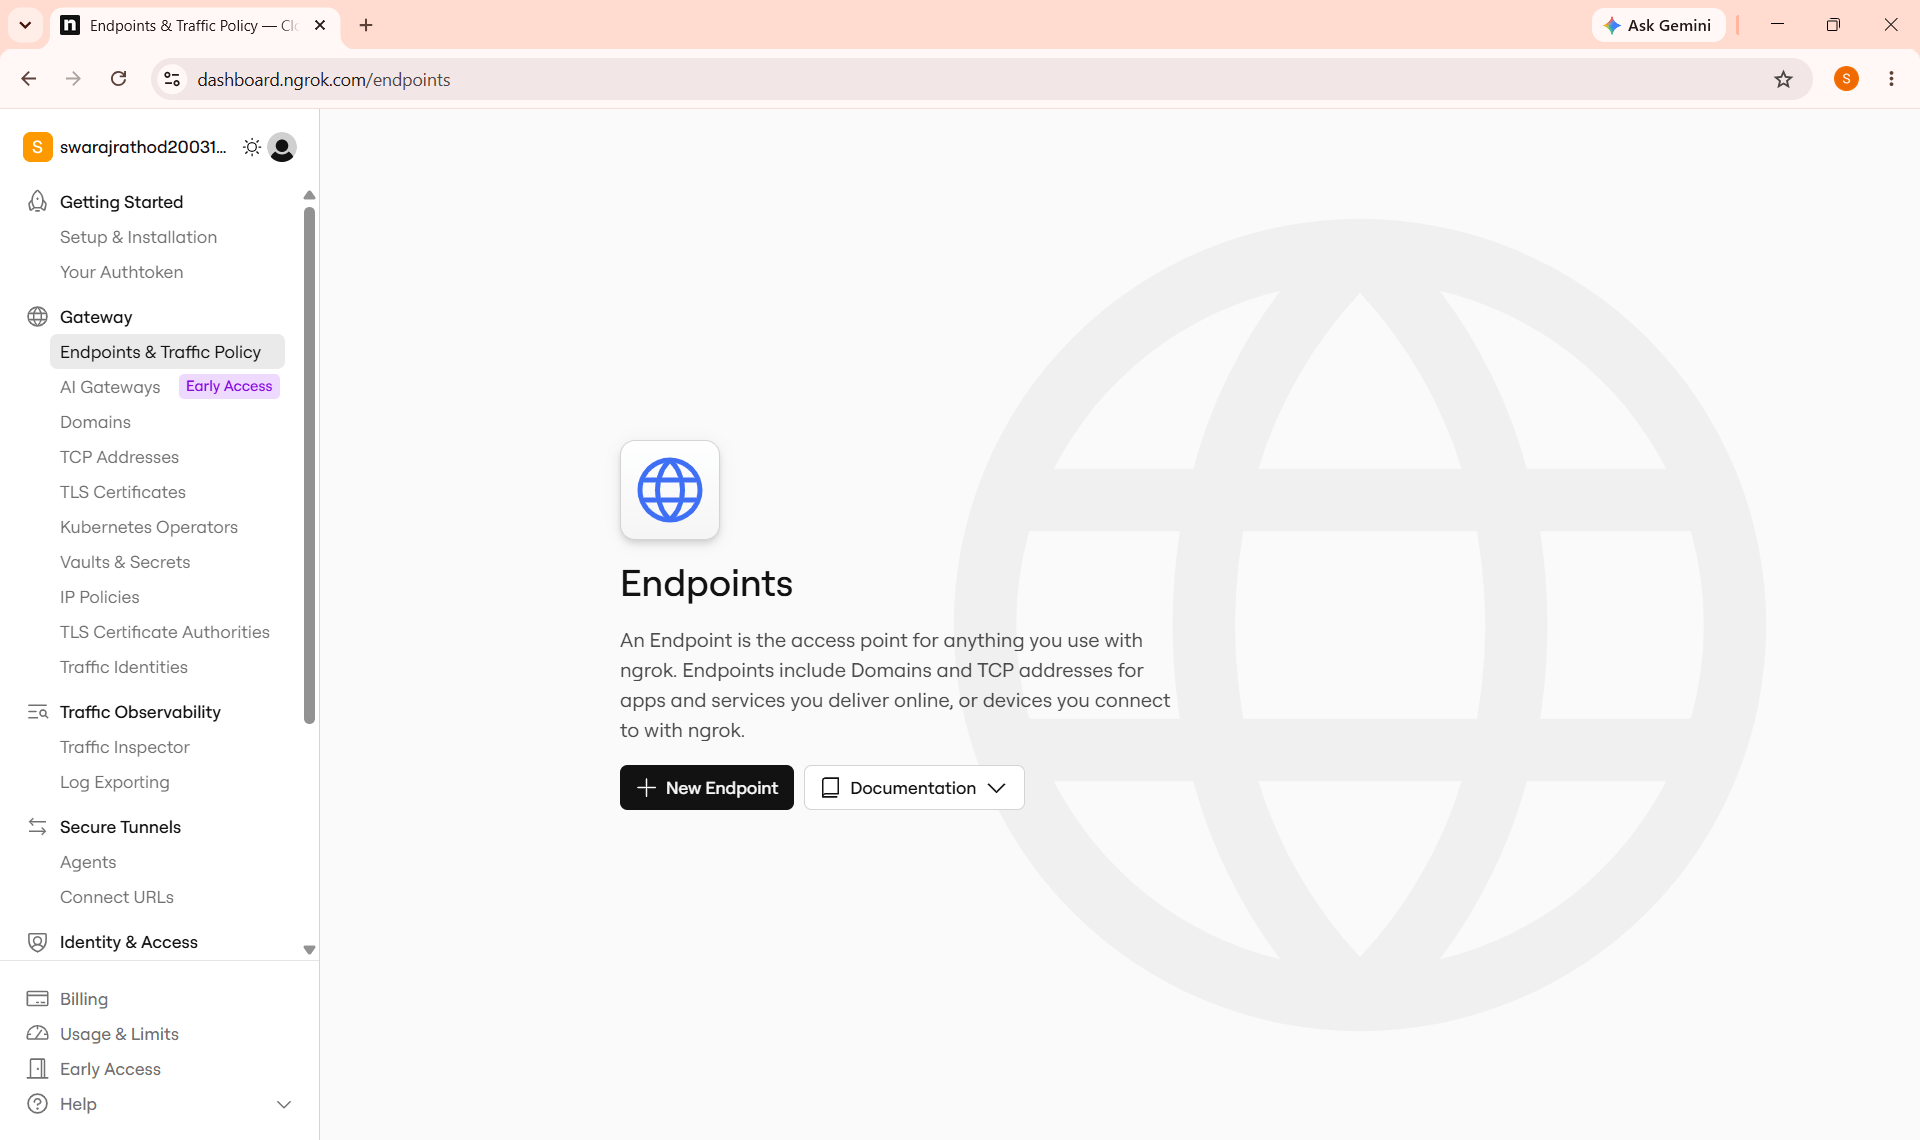
After successfully logging in:
Open the ngrok Dashboard and Click Your Authtoken from the left navigation panel.
a
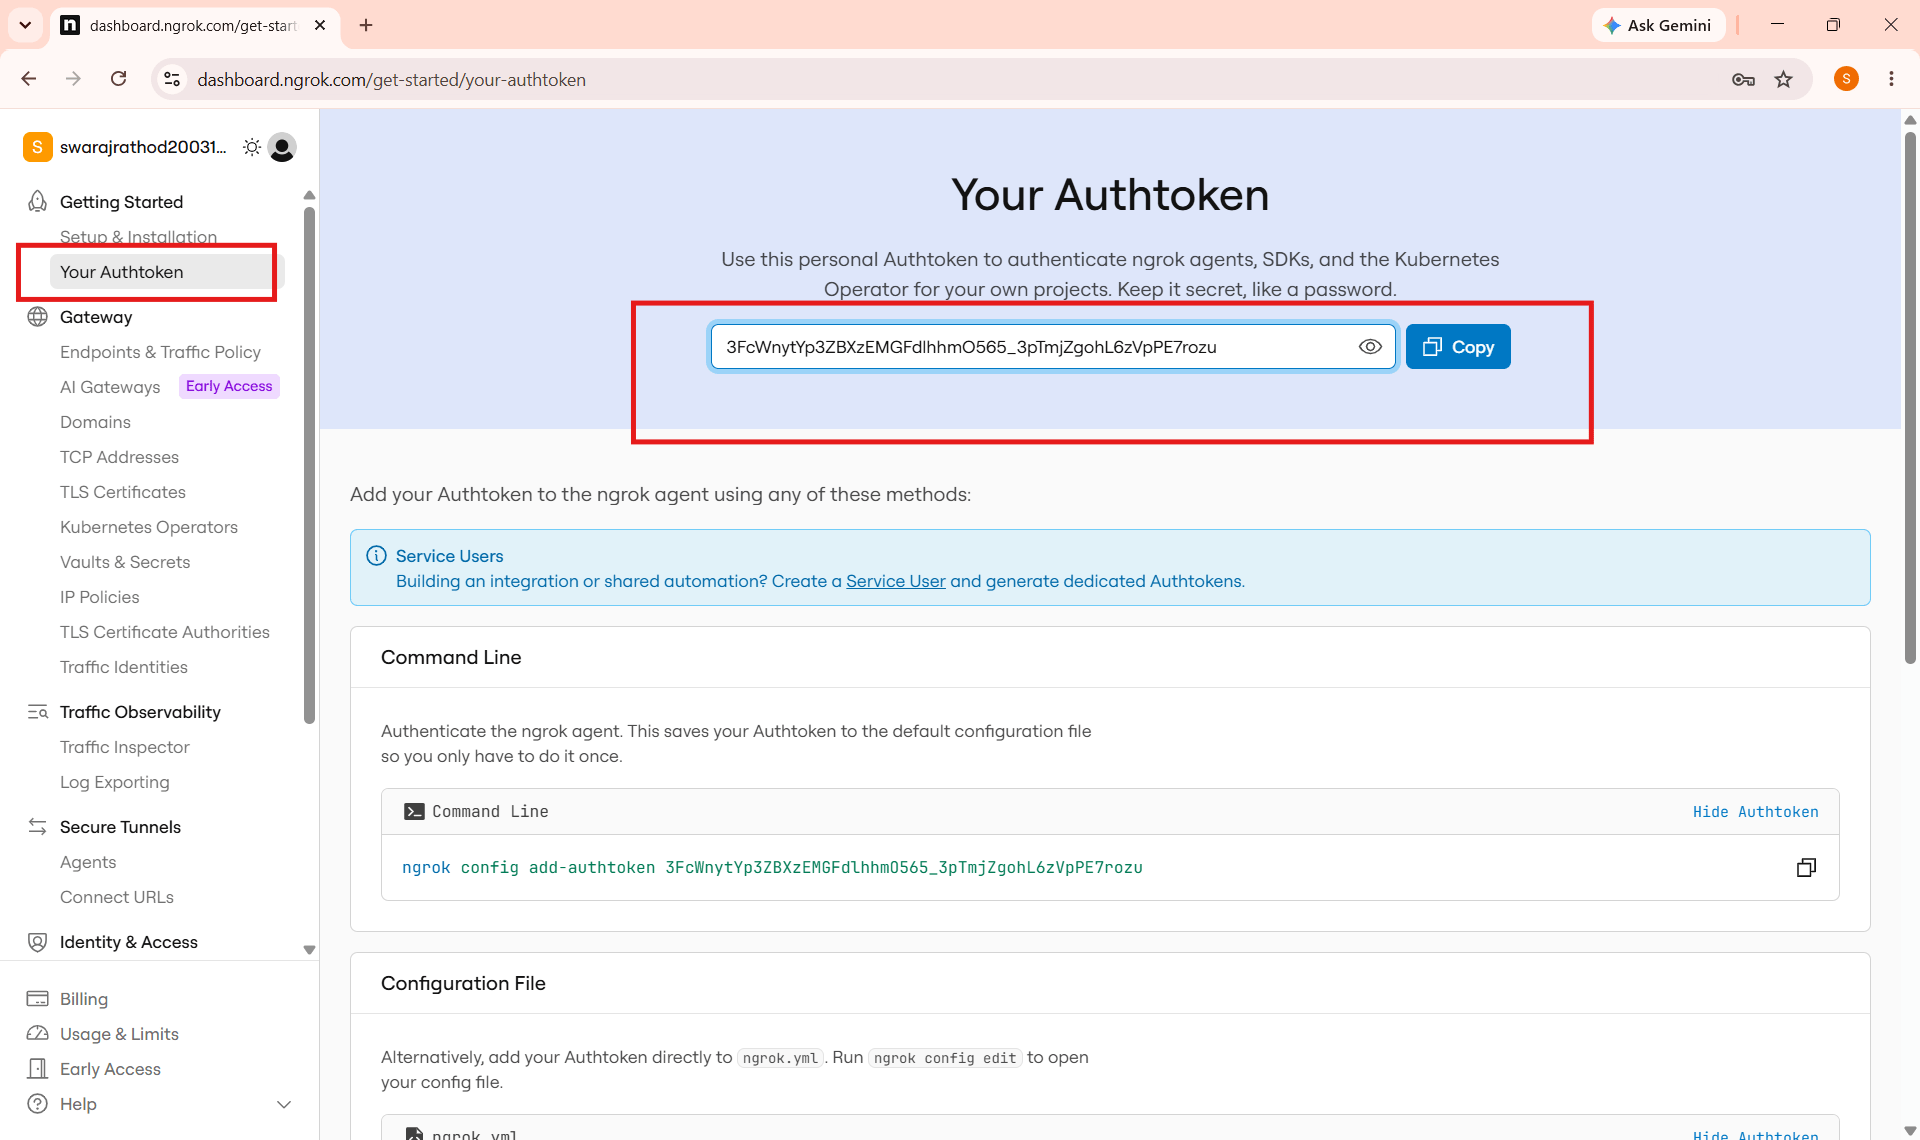
Copy your Authentication Token.
b
The Authentication Token authenticates your local machine with your ngrok account.
Open your Google Colab File
3
Click to download previous file : ML Lab 16.ipynb
Install Required Libraries
4
!pip install streamlit pyngrokImport Required Libraries
5
from pyngrok import ngrok
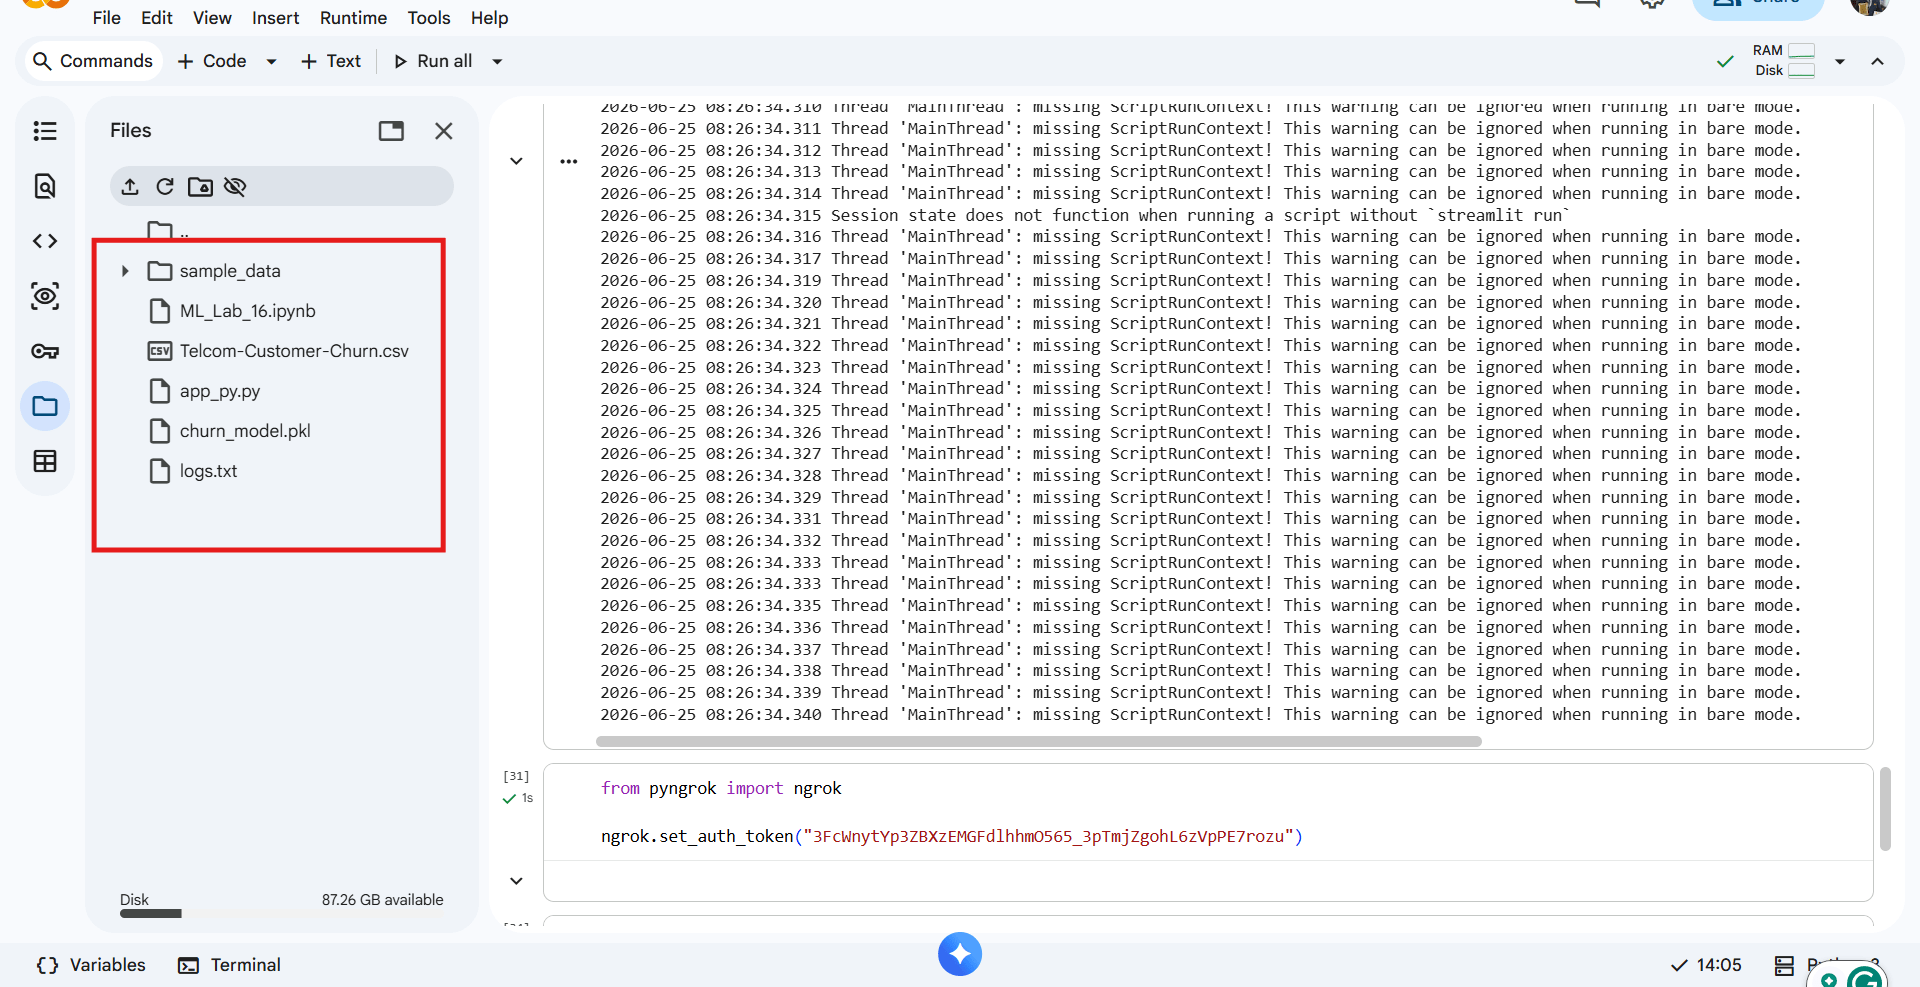
import osConfigure ngrok Authentication
6
Replace "YOUR_NGROK_AUTH_TOKEN" with the Authentication Token copied from your ngrok dashboard.
from pyngrok import ngrok

ngrok.set_auth_token("YOUR_NGROK_AUTH_TOKEN")
This command authenticates your local environment with ngrok.
After successful authentication, you will be able to generate secure public URLs for your Streamlit application.
Verify the Streamlit Application
7
Click to app.py file : app.py
Before deployment, ensure that the Streamlit application developed in the previous lab is available.
This file contains the Customer Churn Prediction application that will be deployed.
Run the Streamlit Application
8
!streamlit run app_py.py &>/content/logs.txt &Create an ngrok Tunnel
9
public_url = ngrok.connect(8501)

print(public_url)
Now expose the locally running Streamlit application to the internet.

Open the Public URL, use the dashboard to visualize the prediction
10
Copy the generated HTTPS URL and open it in your web browser.
The generated URL points to your locally running Streamlit application.
Anyone with this URL can access your application until the ngrok tunnel is active.
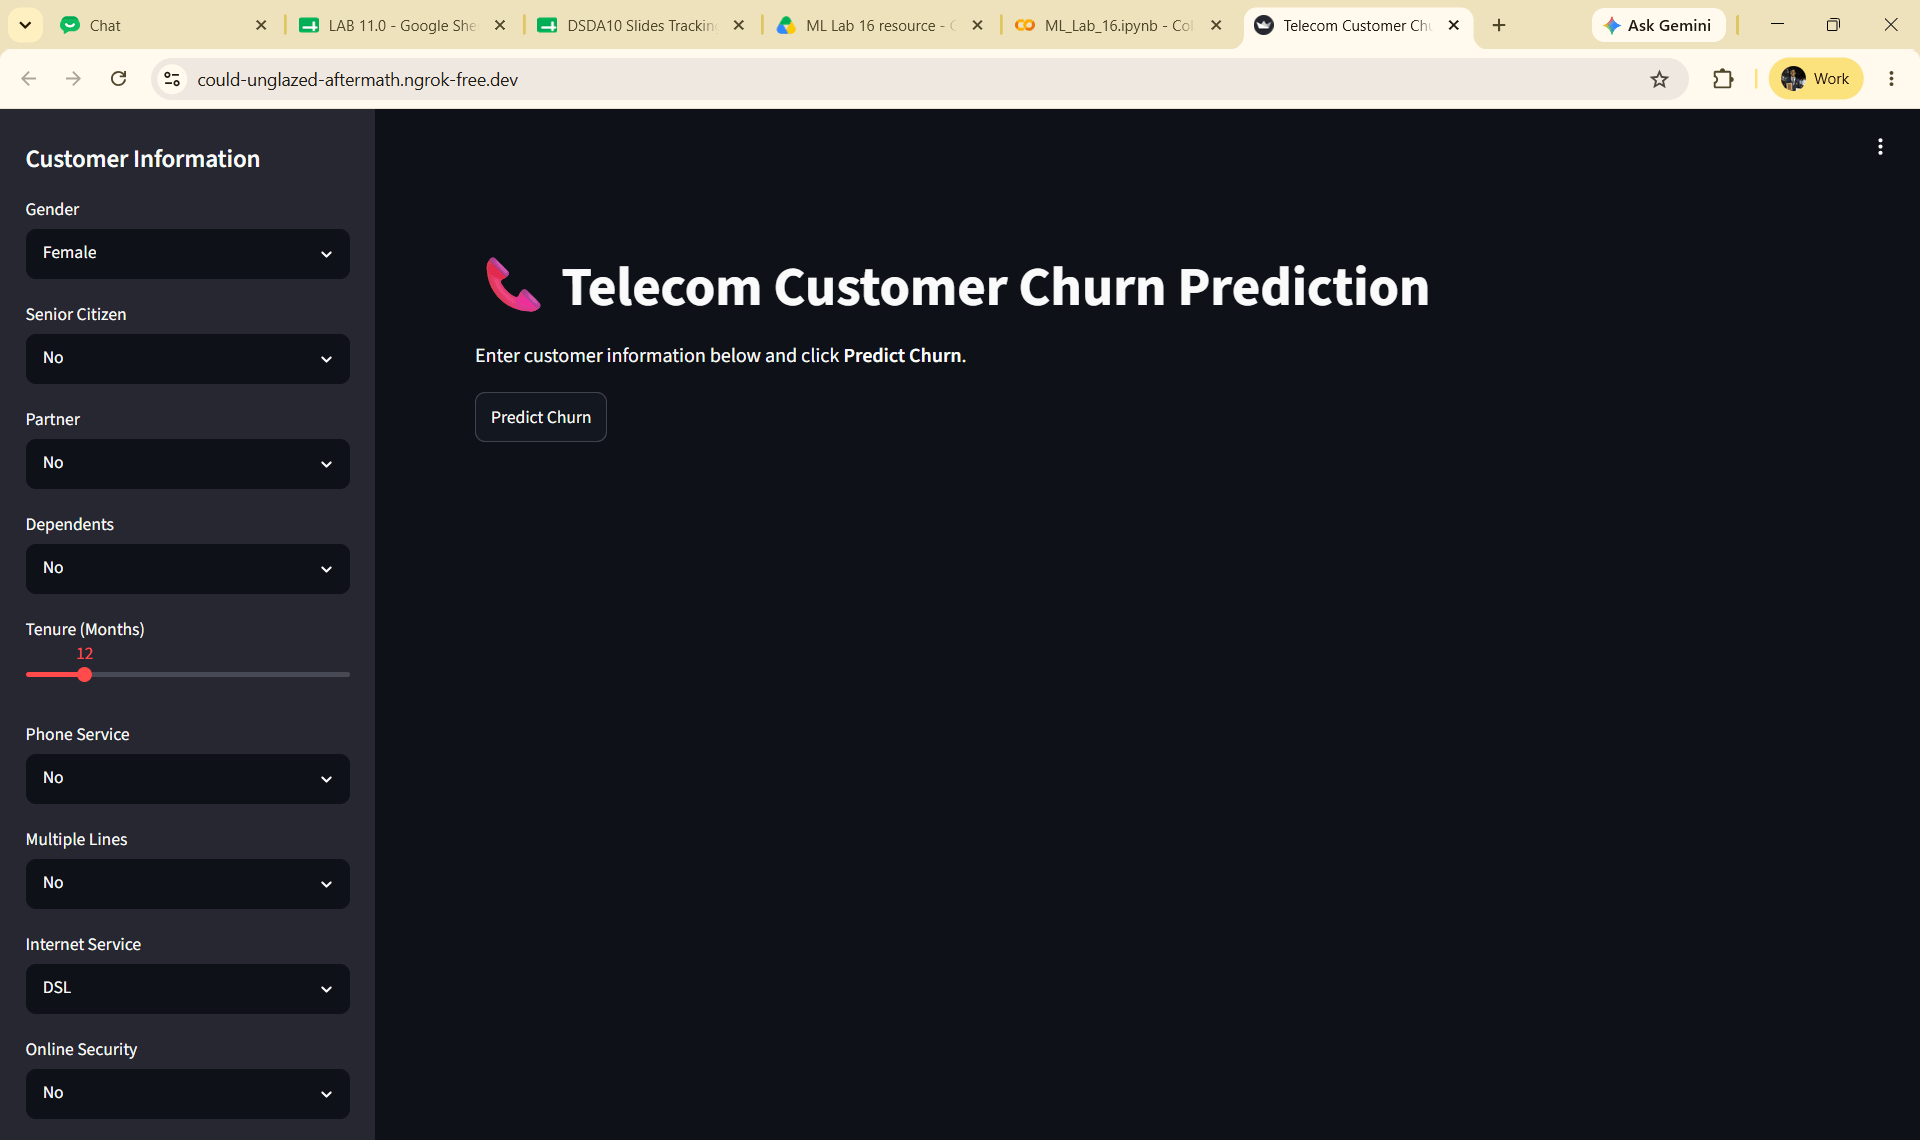
Business users can now access the Customer Churn Prediction application directly from a web browser without installing Python or Streamlit.
Stop the ngrok Tunnel
11
Once testing is complete, stop the ngrok tunnel.
ngrok.kill()- This command closes all active ngrok tunnels.
- The generated public URL becomes inactive.
- This helps conserve system resources and enhances security.
Great job!
You have successfully completed Lab 17: Deploy Machine Learning Model for Real-World Use.
In this lab, you have: Understood the importance of Machine Learning model deployment, Learned how ngrok creates secure tunnels, Created and configured an ngrok account, Authenticated your local environment using an ngrok authentication token, Successfully launched the Streamlit application, Generated a secure public URL using ngrok, Tested the deployed application from different devices, Shared the Machine Learning application with business users.
Checkpoint
Git Push
git push origin branchName