Create a detailed penetration testing report including exploitation steps and remediation

Business Scenario
Welcome!
Today is your first day as a Junior Security Consultant at our company.
Today, we received a security assessment project from a client.
The client wants us to prepare professional security reports based on the findings from a deliberately vulnerable web application.

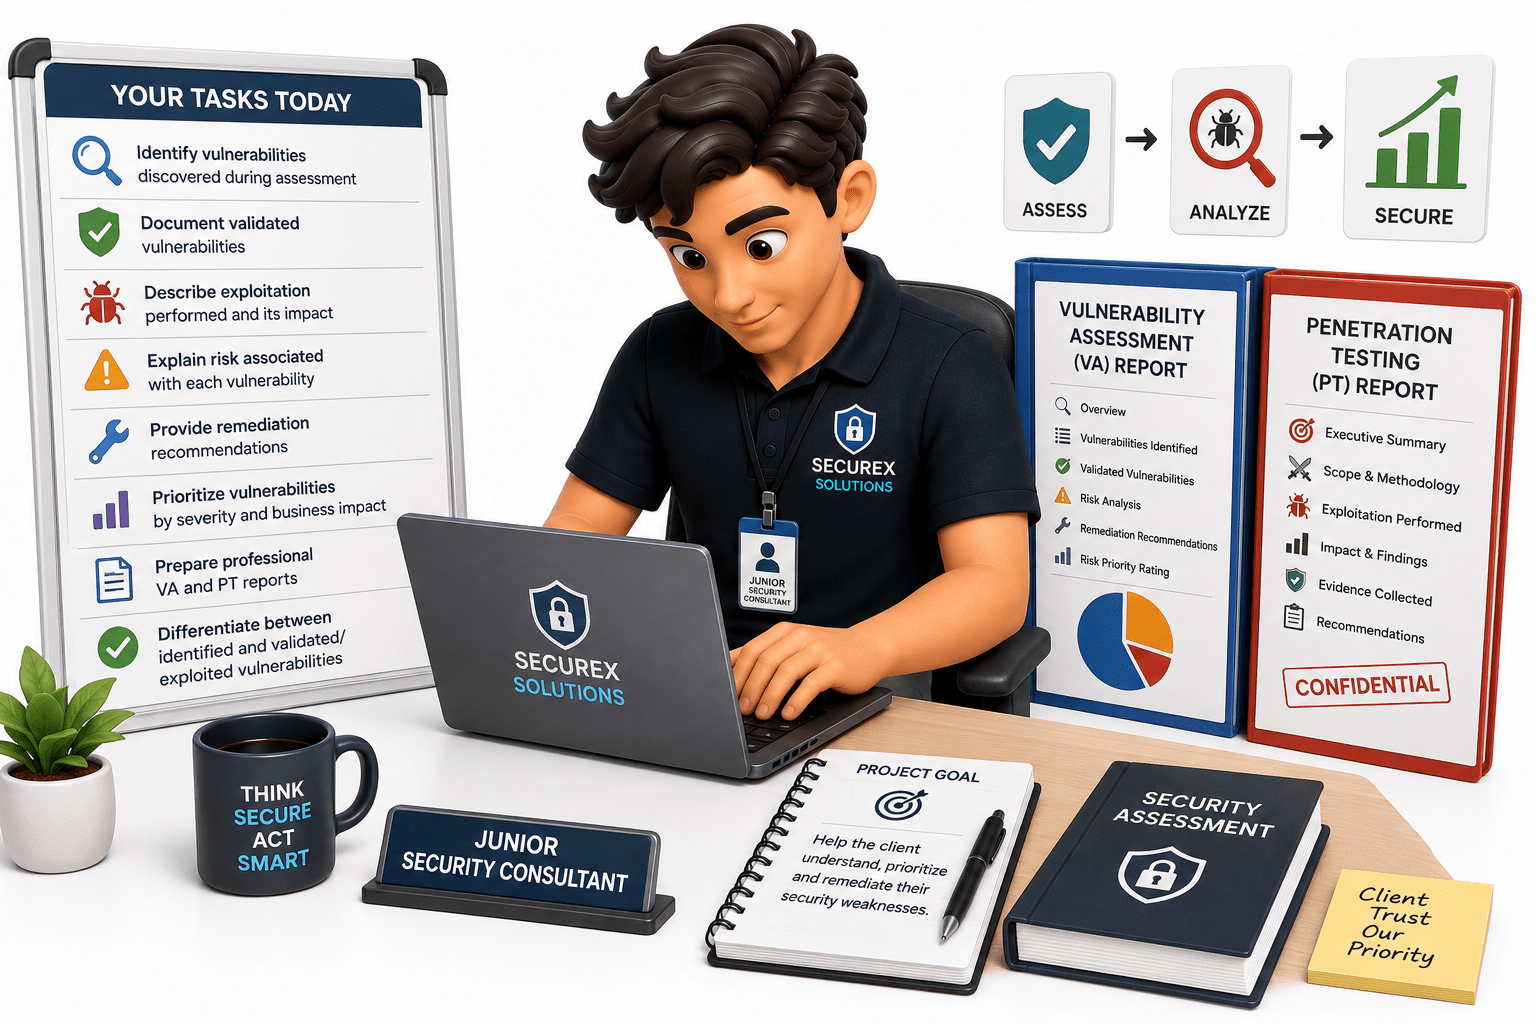
In this task, you will:
- Identify the vulnerabilities discovered during the assessment
- Document which vulnerabilities were successfully validated
- Describe the exploitation performed and its impact
- Explain the risk associated with each vulnerability
- Provide appropriate remediation recommendations
- Prioritize the vulnerabilities based on their severity and business impact
- Prepare two professional deliverables: a Vulnerability Assessment (VA) Report and a Penetration Testing (PT) Report
- Clearly distinguish between identified vulnerabilities and validated/exploited vulnerabilities
Your goal is to transform the previous assessment findings into clear, professional reports that help the client understand, prioritize, and remediate their security weaknesses.
Pre-Lab Preparation
In this task, you will:
- Identify the vulnerabilities discovered during the assessment
- Document which vulnerabilities were successfully validated
- Describe the exploitation performed and its impact
- Explain the risk associated with each vulnerability
- Provide appropriate remediation recommendations
- Prioritize the vulnerabilities based on their severity and business impact
- Prepare two professional deliverables: a Vulnerability Assessment (VA) Report and a Penetration Testing (PT) Report
- Clearly distinguish between identified vulnerabilities and validated/exploited vulnerabilities
Your goal is to transform the previous assessment findings into clear, professional reports that help the client understand, prioritize, and remediate their security weaknesses.
Topic : Weaving the world of Web
1) Navigating the world of Web
2) Building Blocks of Website,
3) Tag Titans: Fundamental Web Construct.
Task 1: Understand the Difference Report vs PT Report
Students must complete the following table.
| Aspect | Vulnerability Assessment | Penetration Testing |
|---|---|---|
| Main purpose | Identify vulnerabilities | Validate security weaknesses through controlled testing |
| Focus | Finding Vulnerabilities | Exploitation and Impact |
| Exploitation | Usually Limited/not required | Controlled exploitation may be performed |
| Proof | Scanner/manual evidence | Exploitation evidence and validation |
| Output | List of vulnerabilities | Findings + attack path + impact |
| Risk | Based on vulnerability characteristics | Based on validated impact and attack scenario |
Write 5 differences between a VA report and a PT report in your own words.
Task 2: Use Previous Findings
Students must take the findings from the previous VAPT exercise and create a master finding sheet.
| ID | Vulnerability Assessment | Affected Area | Severity | Status |
|---|---|---|---|---|
| VA-001 | SQL Injection | Login | Critical | Confirmed |
| VA-002 | Stored XSS | Feedback | High | Confirmed |
| VA-003 | Weak Password Policy | Authentication | Medium | Confirmed |
| VA-004 | Missing Security Headers | Web Server | Low | Identified |
| VA-005 | Directory Listing | /uploads/ | Medium | Confirmed |
Student Task :-
For each finding, identify:
-
Affected component
-
Vulnerability type
-
Severity
-
Validation status
-
Evidence available
-
Potential impact
-
Recommended fix
Task 3: Importance of Proof and Validation
A vulnerability should not simply be reported because a scanner generated an alert.
Students must determine whether the finding has been validated.
Validation Process :-
For each finding, identify:
-
Affected component
-
Vulnerability type
-
Severity
-
Validation status
-
Evidence available
-
Potential impact
-
Recommended fix
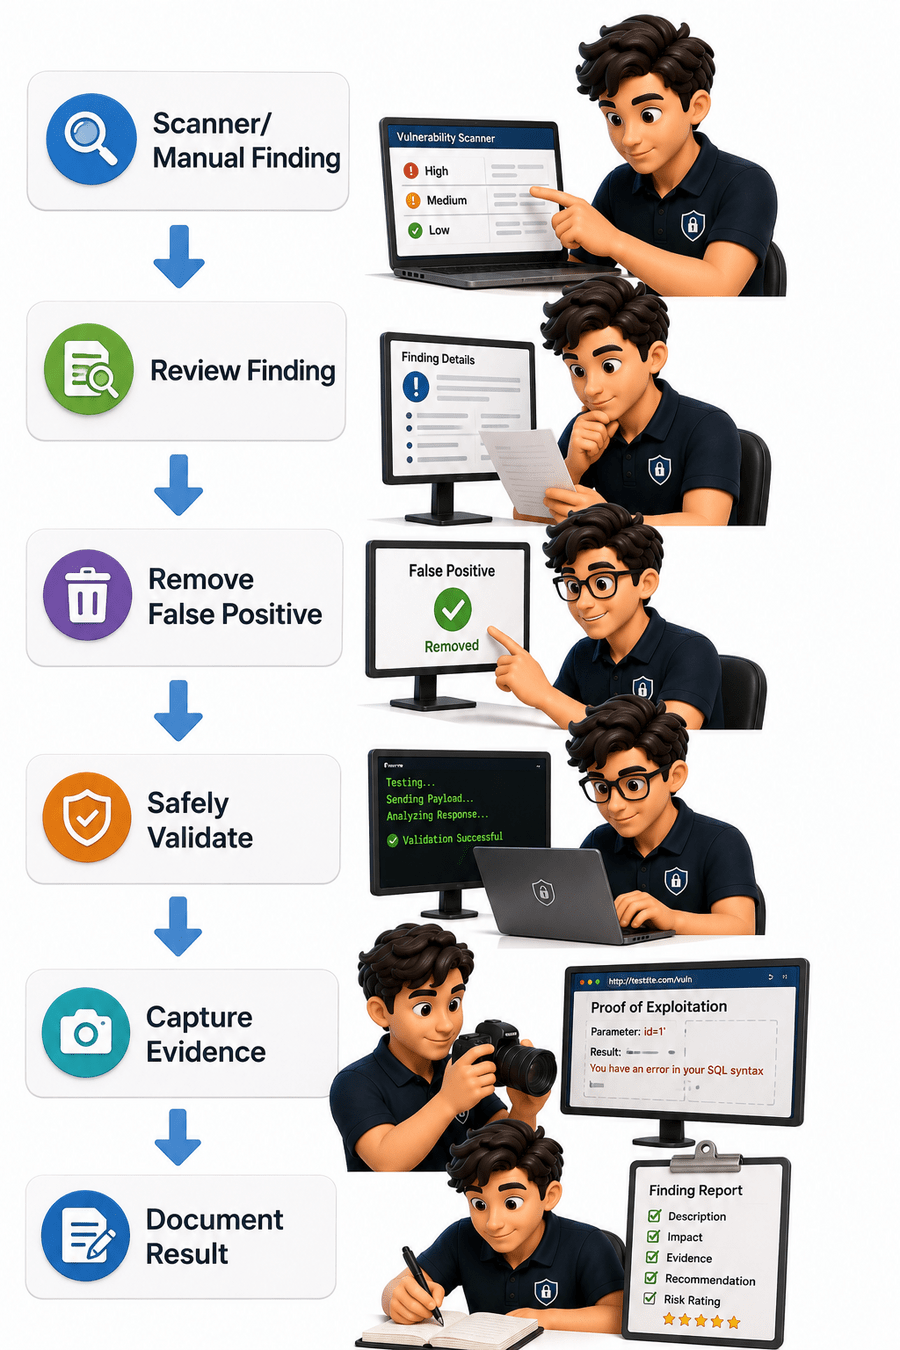
Student Task :-
For each finding, answer:
- How was the vulnerability identified?
- How was it validated?
- What evidence proves the finding?
- Is exploitation required to demonstrate the risk?
- Could the finding be a false positive?
Acceptable evidence can include:
- Screenshot
- HTTP request/response
- Application response
- Security scanner result
- Browser output
- Configuration output
- Relevant log entry
- Important: Testing must remain inside the authorized lab environment.
Evidence Examples :-
Acceptable evidence can include:
- Screenshot
- HTTP request/response
- Application response
- Security scanner result
- Browser output
- Configuration output
- Relevant log entry
- Important: Testing must remain inside the authorized lab environment.
Task 3: Add Exploitation Details
For confirmed findings, students must document the exploitation process at a high level.
Use this format:
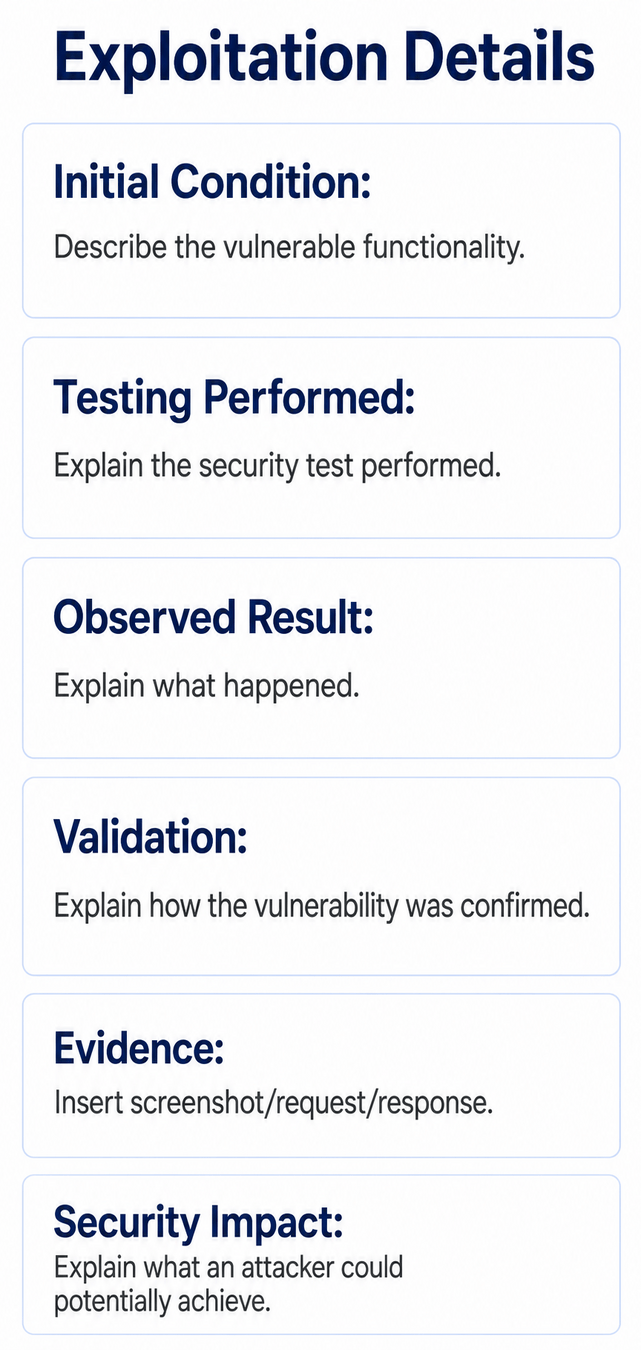
Example: SQL Injection
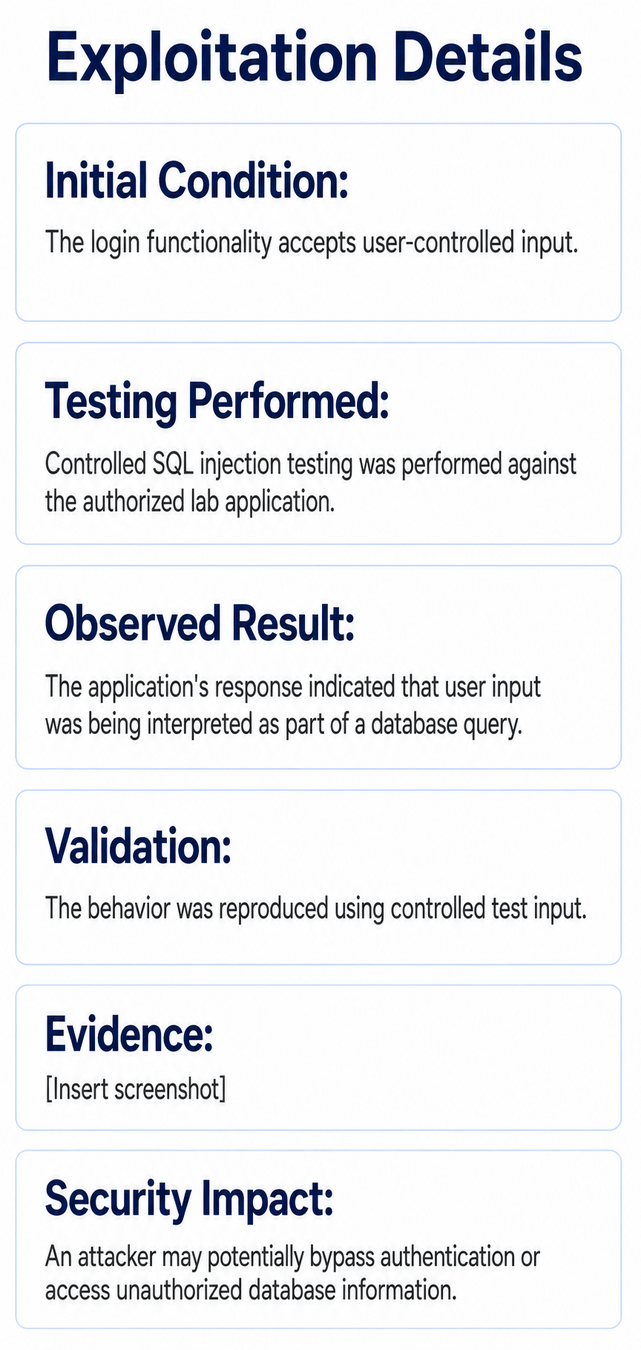
Students should not include unnecessary destructive actions or real-world attack activity.
Task 5: Risk & Impact Analysis
Students must analyze each vulnerability using both technical risk and business impact.
Risk Analysis Template
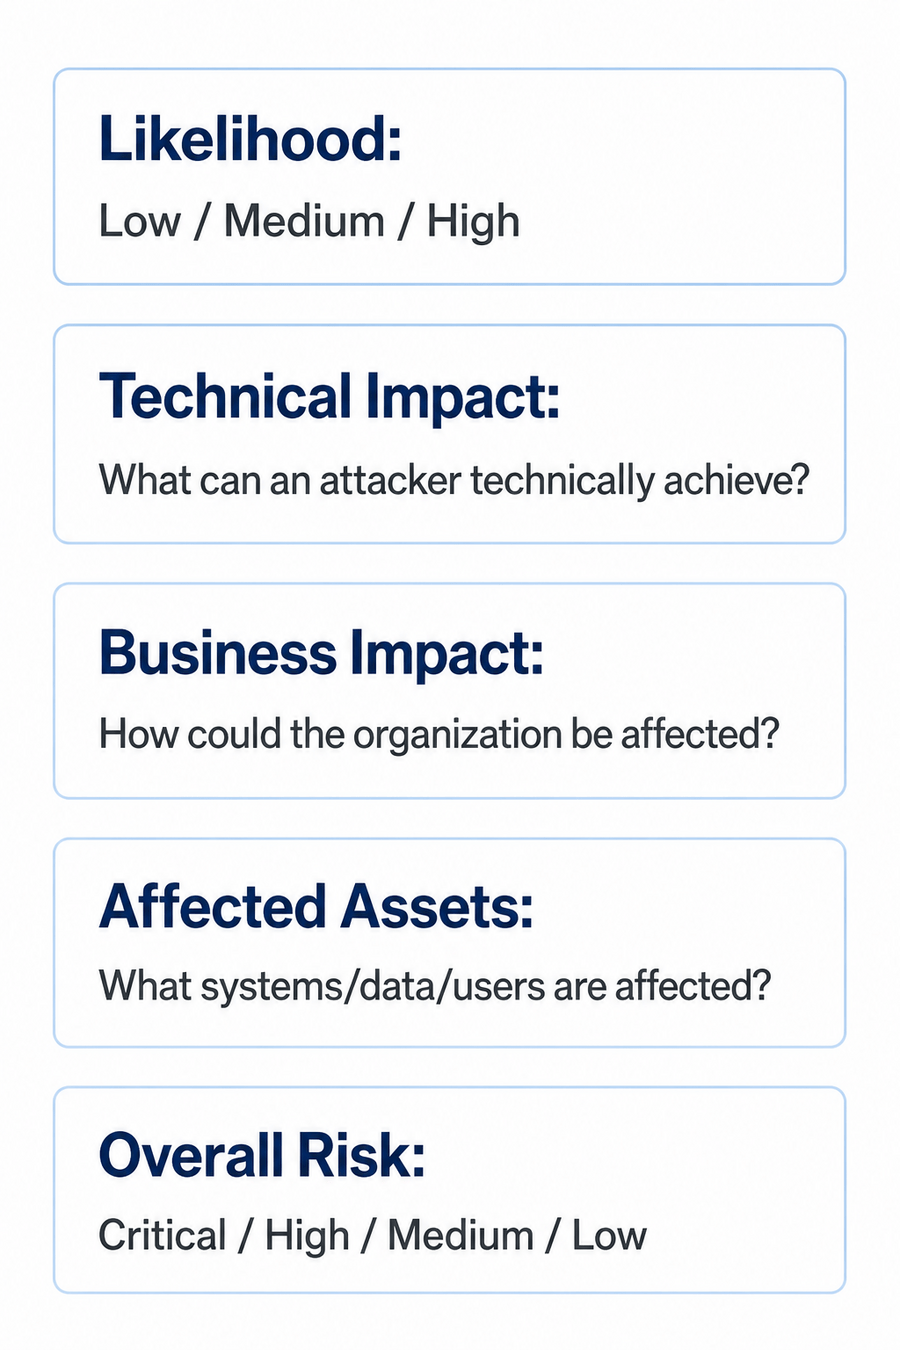
Example
Vulnerability: Stored XSS
Likelihood: Medium
Technical Impact:
An attacker may be able to execute unauthorized client-side code in another user's browser.
Business Impact:
Successful exploitation could affect user accounts, session security, or customer trust.
Overall Risk: High
Example
Vulnerability: Stored XSS
Likelihood: Medium
Technical Impact:
An attacker may be able to execute unauthorized client-side code in another user's browser.
Business Impact:
Successful exploitation could affect user accounts, session security, or customer trust.
Overall Risk: High
Task 6: Risk & Impact Analysis
Students must prioritize all findings
Risk Matrix
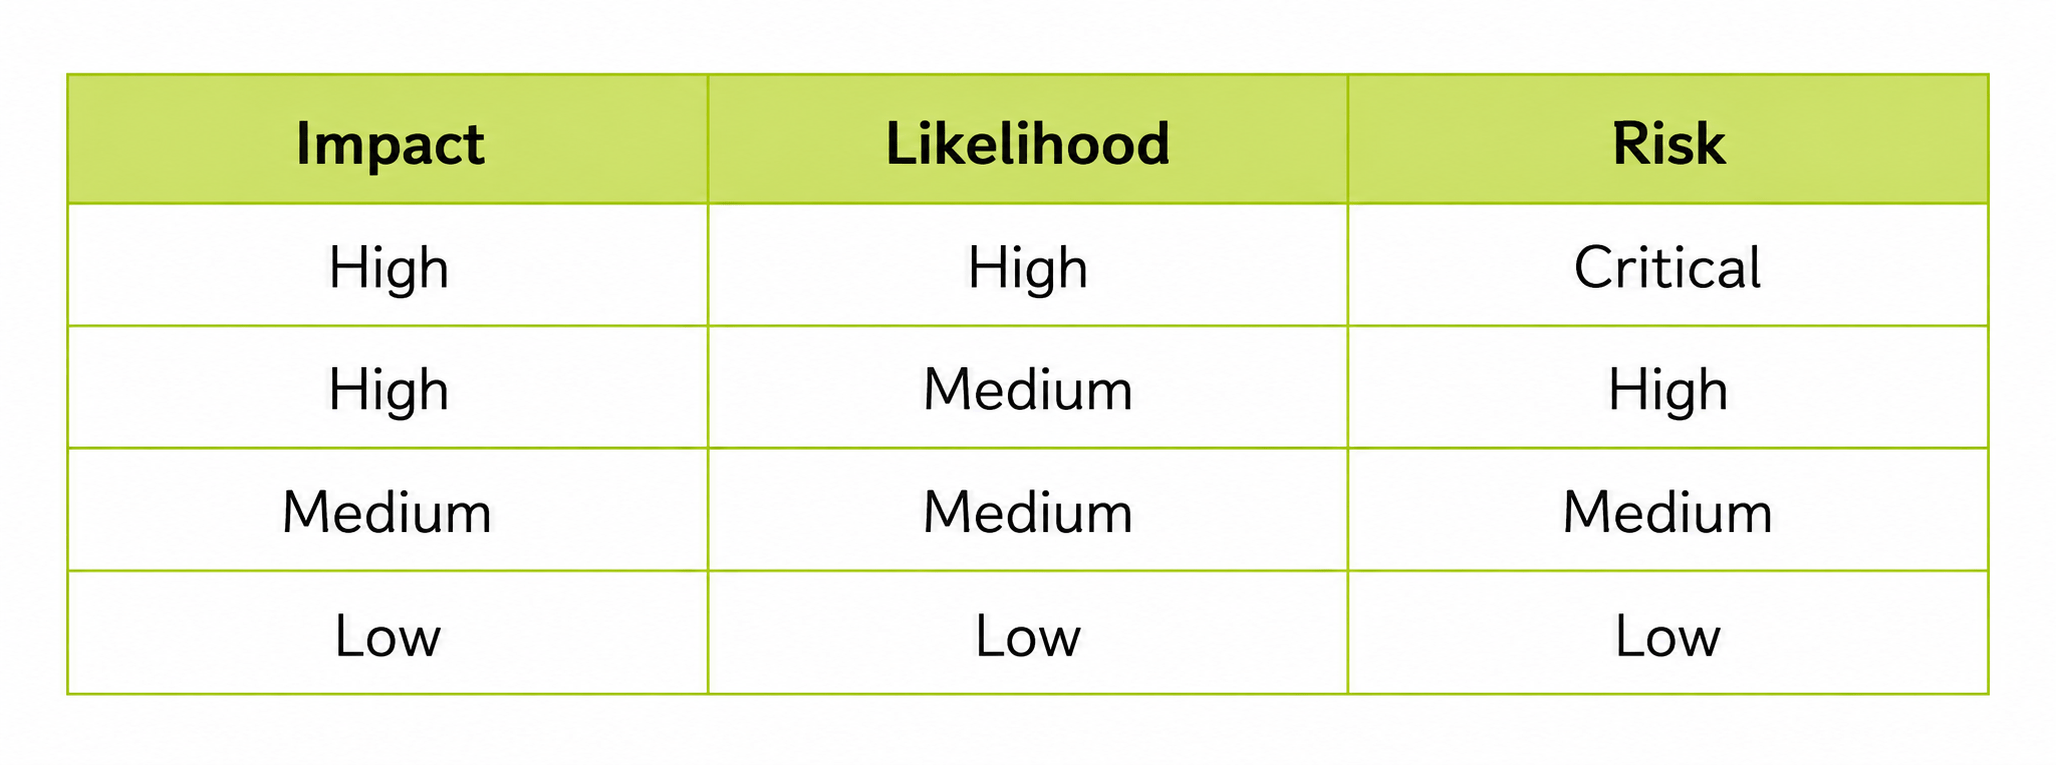
Students should create a priority list:
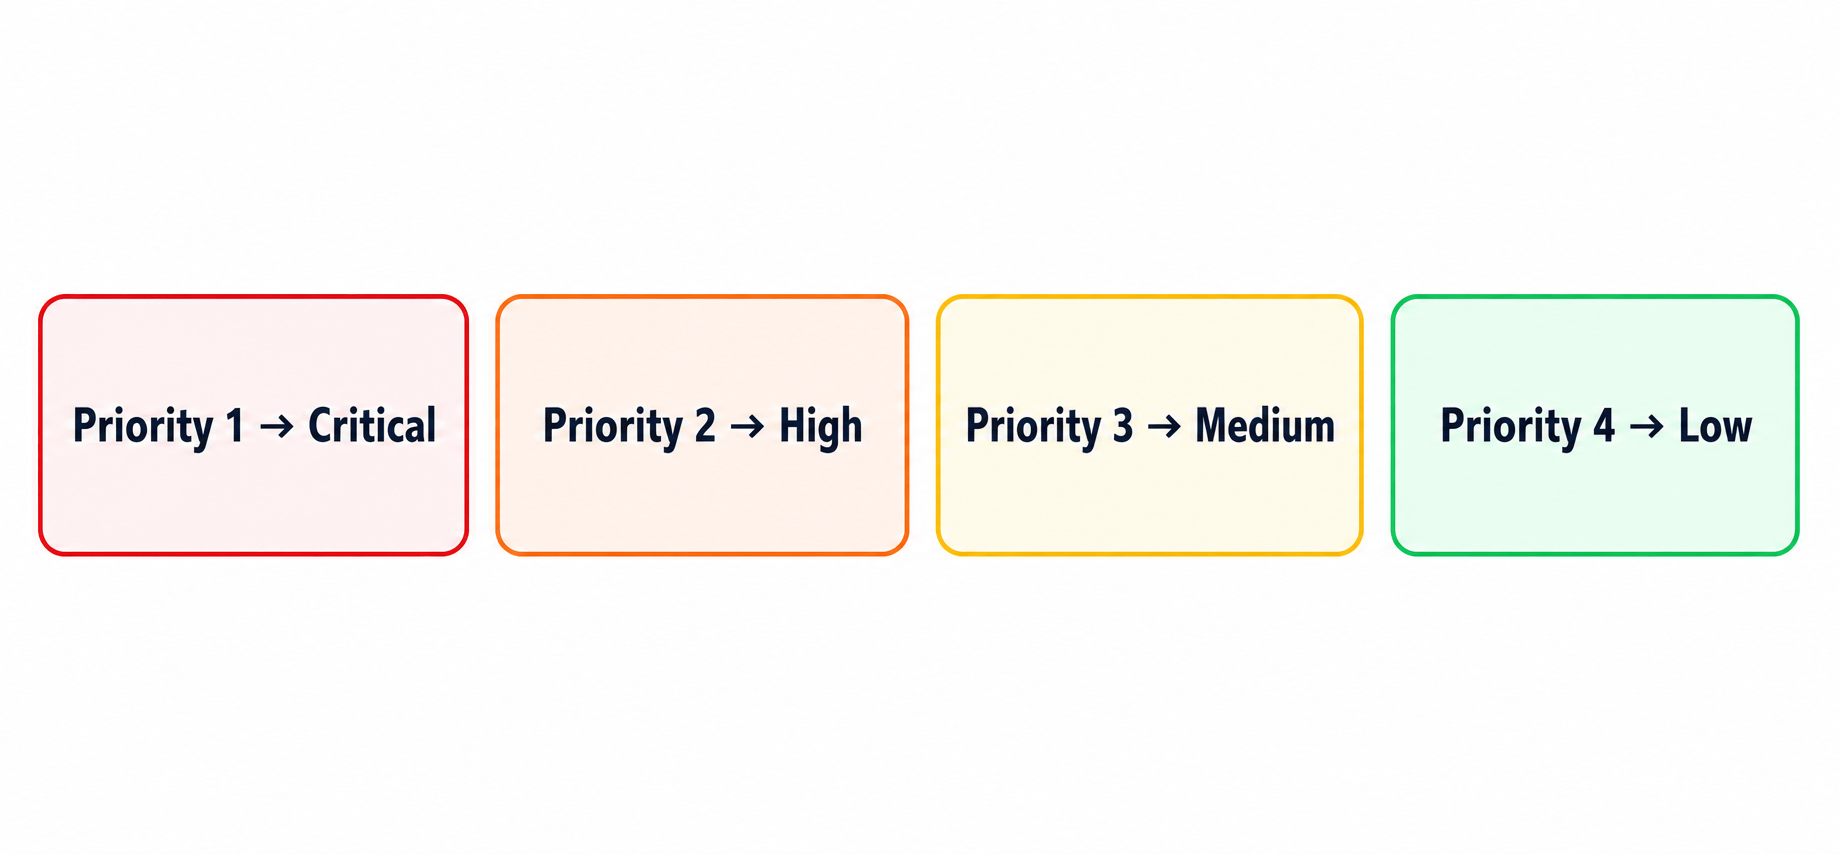
Student Task
Rank the five sample vulnerabilities from 1 to 5 based on risk.
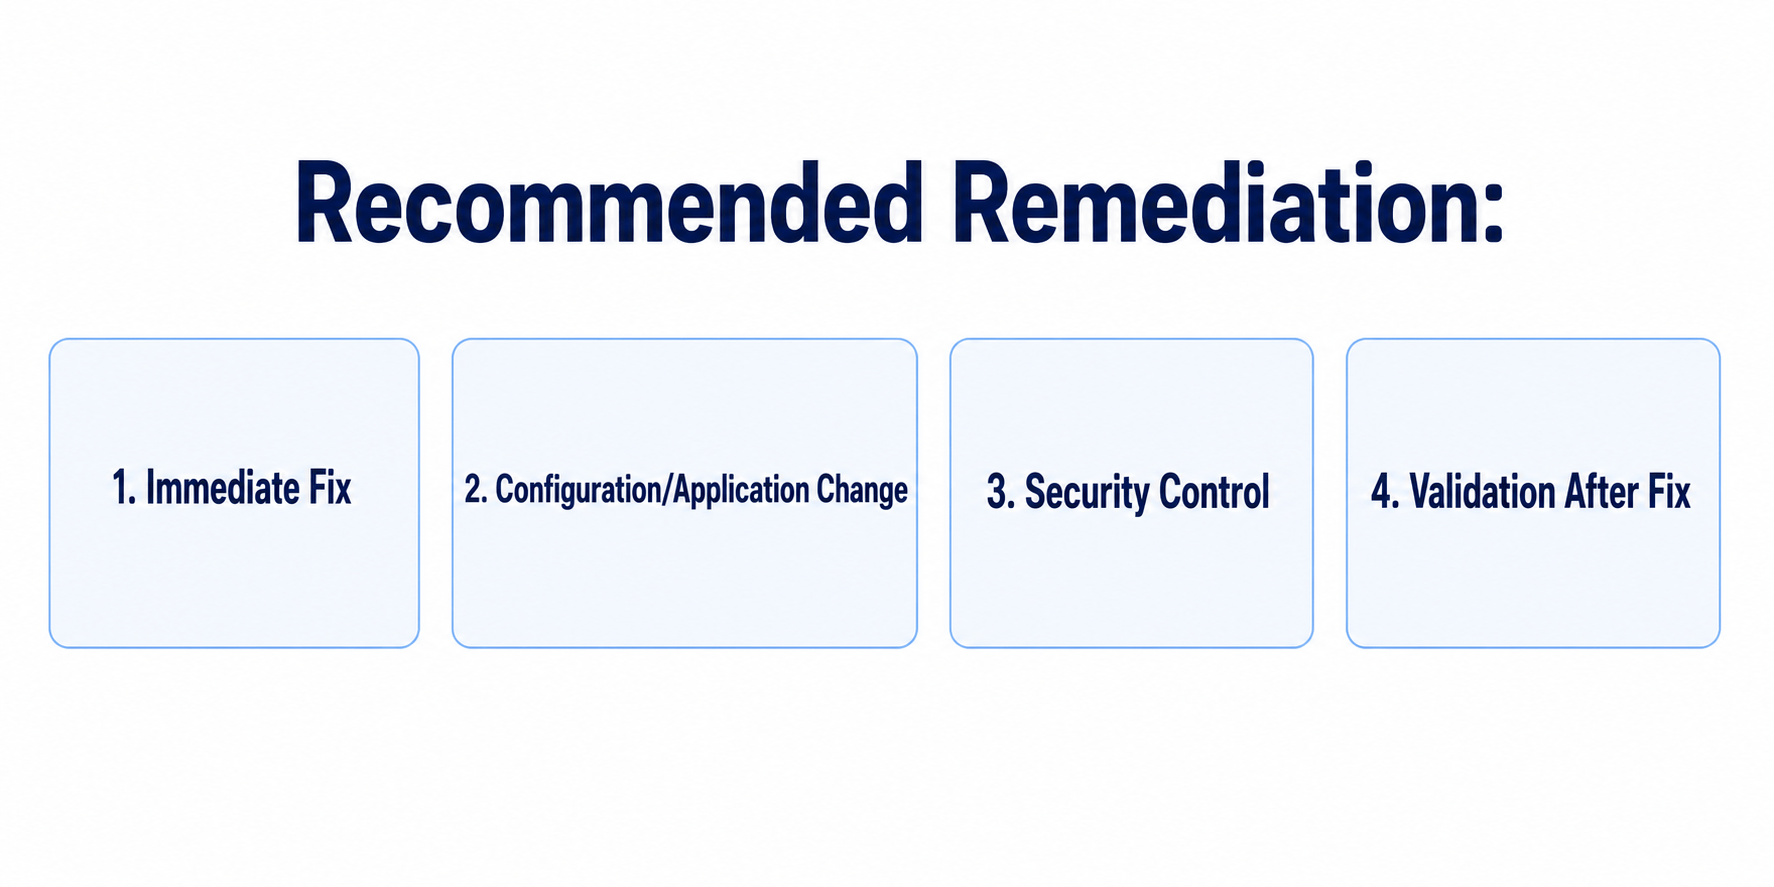
Task 7: Writing Remediation Strategies
For every vulnerability, students must provide a practical remediation strategy.
Use:
| Col 1 | Col 2 | Col 3 |
|---|---|---|
| Row 1 | ||
| Row 2 | ||
| Row 3 |
Formula
Profit = Revenue - Cost
Task 2: Create WireFrame
Now that you understand the requirements, don’t jump into coding yet. Before development, we always visualize the layout.
Now lets create a simple wireframe for the homepage.
A wireframe is like a layout plan of a house. Before building, you decide where rooms, doors, and windows will be placed.Similarly, a wireframe helps you plan where elements like headers, images, and buttons will appear on a webpage—before adding design or colours.
Task 3: Code Editor Installation
Good work on completing the planning phase.
Now we will start development. Before that, make sure your system is ready with the required tools.
In this step we will install the VS code editor that will help to Write code efficiently,Organize files , Run and test your application
Go to the visual studio code official website
1
Click to download Homepage Wireframe : Homepage Wireframe
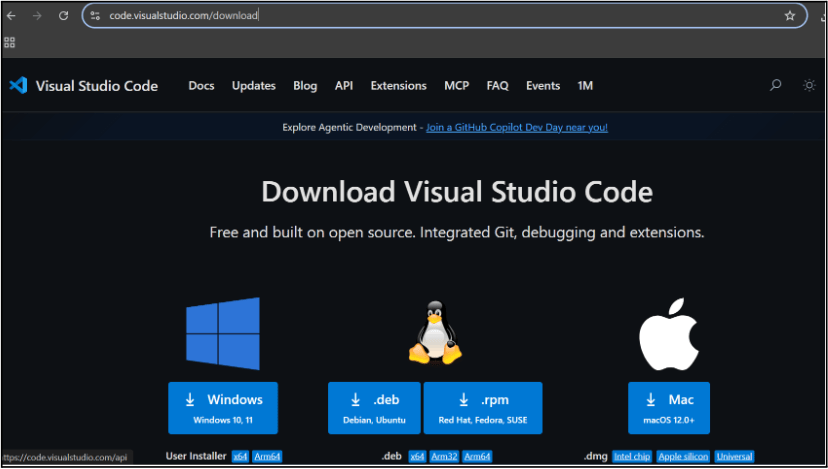
Choose your operating system(windows / Mac) and download the installation file.
Double click on the download app and Accept the agreement and click next
2
It is a long established fact that a reader will be distracted
b
Sub Steps
a
Double click on the download app and Accept the agreement and click next
public class MathSample {
    public static void main(String[] args) {
        int x = 10;
        int y = 20;
        int sum = x + y;

        System.out.println("The sum is: " + sum);
    }
}
public class MathSample {
public static void main(String[] args) {
int x = 10;
int y = 20;
int sum = x + y;
System.out.println("The sum is: " + sum);
}
}
public class MathSample {
public static void main(String[] args) {
int x = 10;
int y = 20;
int sum = x + y;
System.out.println("The sum is: " + sum);
}
}
Great job!
You have successfully completed your first lab on BiteBox Project Onboarding.
In this lab, you have: Understood the BRD, Created a wireframe, Set up your development environment, Organised your project structure, Run your first program
You are now ready to move to the next stage of development
Checkpoint

Next-Lab Preparation
Git Push
git push origin branchNameTopic : Working with a Text and Listin HTML
1) Power of HTML text tags
2) Customizing your style with CSS
3) Listing it right using HTML
4) HTML Link up , attributes of tag, block vs inline elements
Text box Width : 887
Business Scenario, Pre-lab Preparation, Next-lab Preparation, Task, Activity, Checkpoint : 90%.
Steps : 1,2,3 [Sub Steps - a,b,c]
Normal Text, Topic Name : 80%
Subtopic : 70%
Code Box font Size : 16px